Click on a picture to go to the section about each plane. Click on any other picture to get a full size image (250-300KB).
| Tiger Moth | Cessna-170 | Tiny | Firefly | Tercel | And_Now |
|
|
|
|
|
|
|
| House Fly | Piccolo | Piccolo brushless | |||
|
|
|
|
|
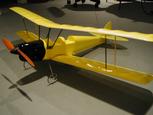
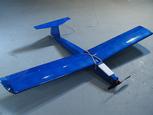
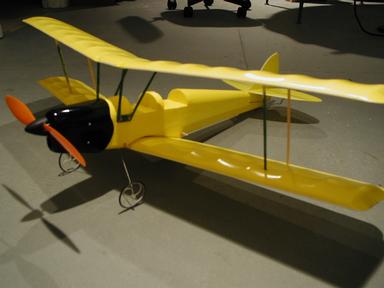
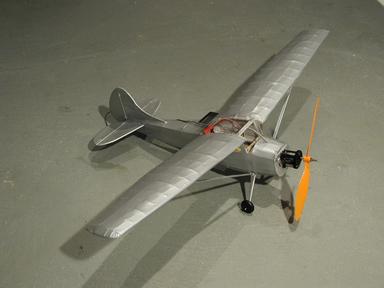
I started out with an almost-ready-to-fly (ARF) airplane kit that looked interesting to me - the GWS Tiger Moth. It has been a lot of fun to build, fly, crash, and rebuild this plane. It is quite durable, being constructed primarily of foam. I built balsa struts (half-painted in this picture), which provides good structural strength, yet break if the load is too high, absorbing some of the shock of hitting the ground (or tree, or fence, or...). The Tiger Moth uses three controls: throttle, rudder, and elevator. The wing is built with a V shape, like the hull of some types of power boats. The V shape forces the plane to bank when the rudder is turned to the left or right. This plane flies at about 10 miles/hour - about a good running speed. I've enjoyed doing touch-and-go landings/takeoffs, loops, wing-over turns, and figure eights with it. It is the model that I used to learn how to fly. In my battery experiments I've been able to achieve flights of greater than 20 minutes.
For more about the contstruction of the Tiger Moth, check out my Tiger Moth web page.
It was the basis for an article I did for the Chesapeake Bay Radio Control
Club.
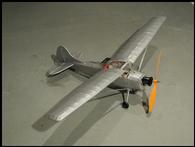
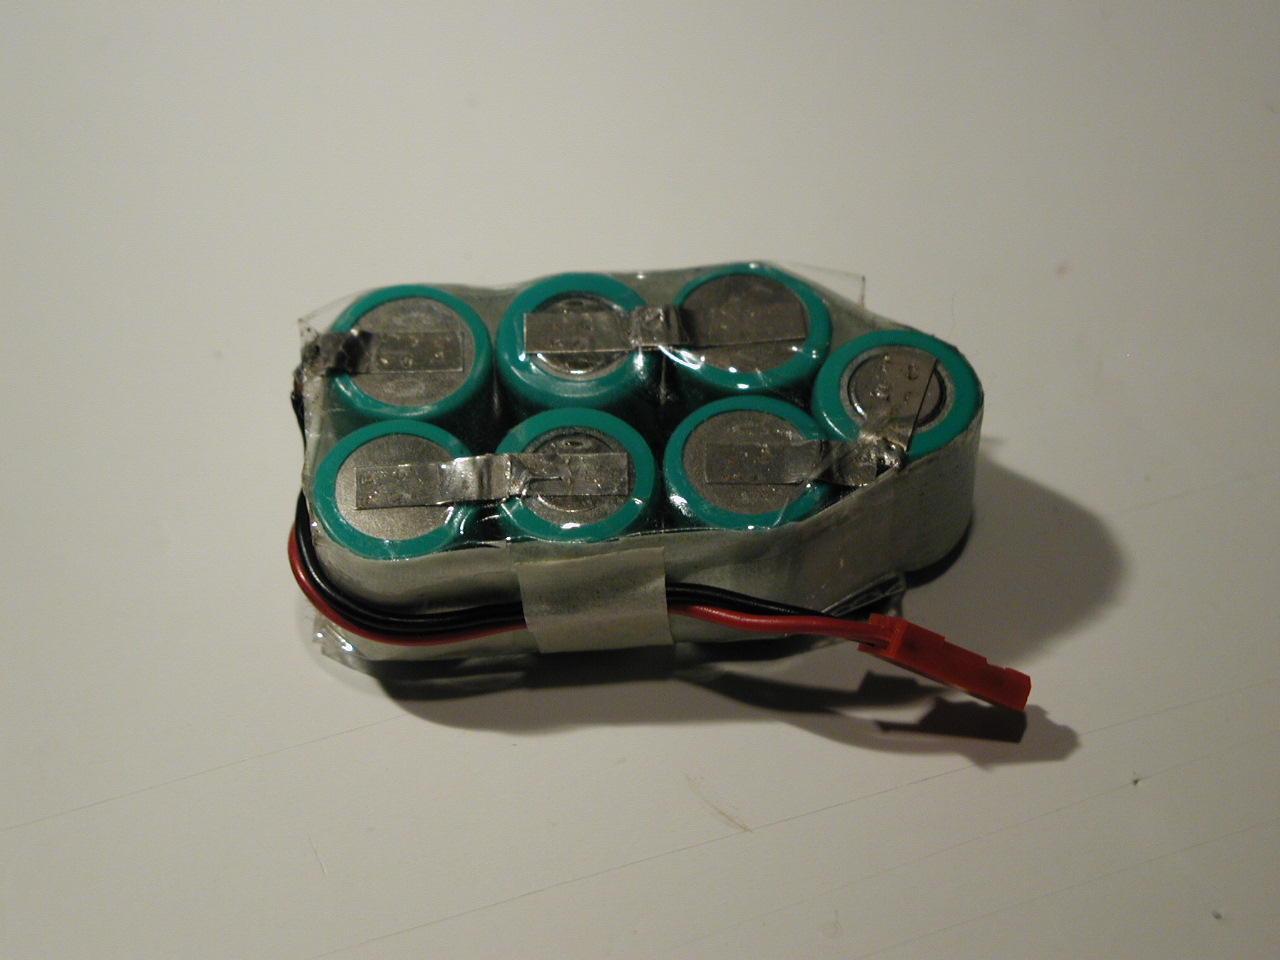
The third airplane was taken from plans that are free on the Internet. It is also available as a kit from Todds Models. I did some slight modifications to minimize the weight. The carbon-fiber tube used as the fuselage was replaced with a light-weight balsa stick. The balsa stick is more fragile, but weighs less. Flying weight with a 7-cell 270mAh NiMh battery (photo below) is 170 grams (6 ounces). I also fly with the 150mAh NiCd batteries that come with the GWS electronics kit.
At that weight, it has to fly when the wind is
less than 5mph, otherwise it just gets pushed around too much.
I've crashed this plane several times, but without significant damage.
Most of the time, the balsa fuselage comes unglued from the
wing. This model will do loops. It also has ailerons, which allows it
to do rolls - something that the Tiger Moth cannot do. I've just
started doing inverted flight - that's a real mind-twister to get used
to the change in how the controls operate when the plane goes inverted.
I've created a Tiny web page that
contains more detailed information on the construction and flying of
Tiny.
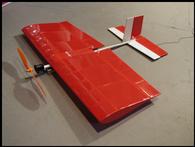
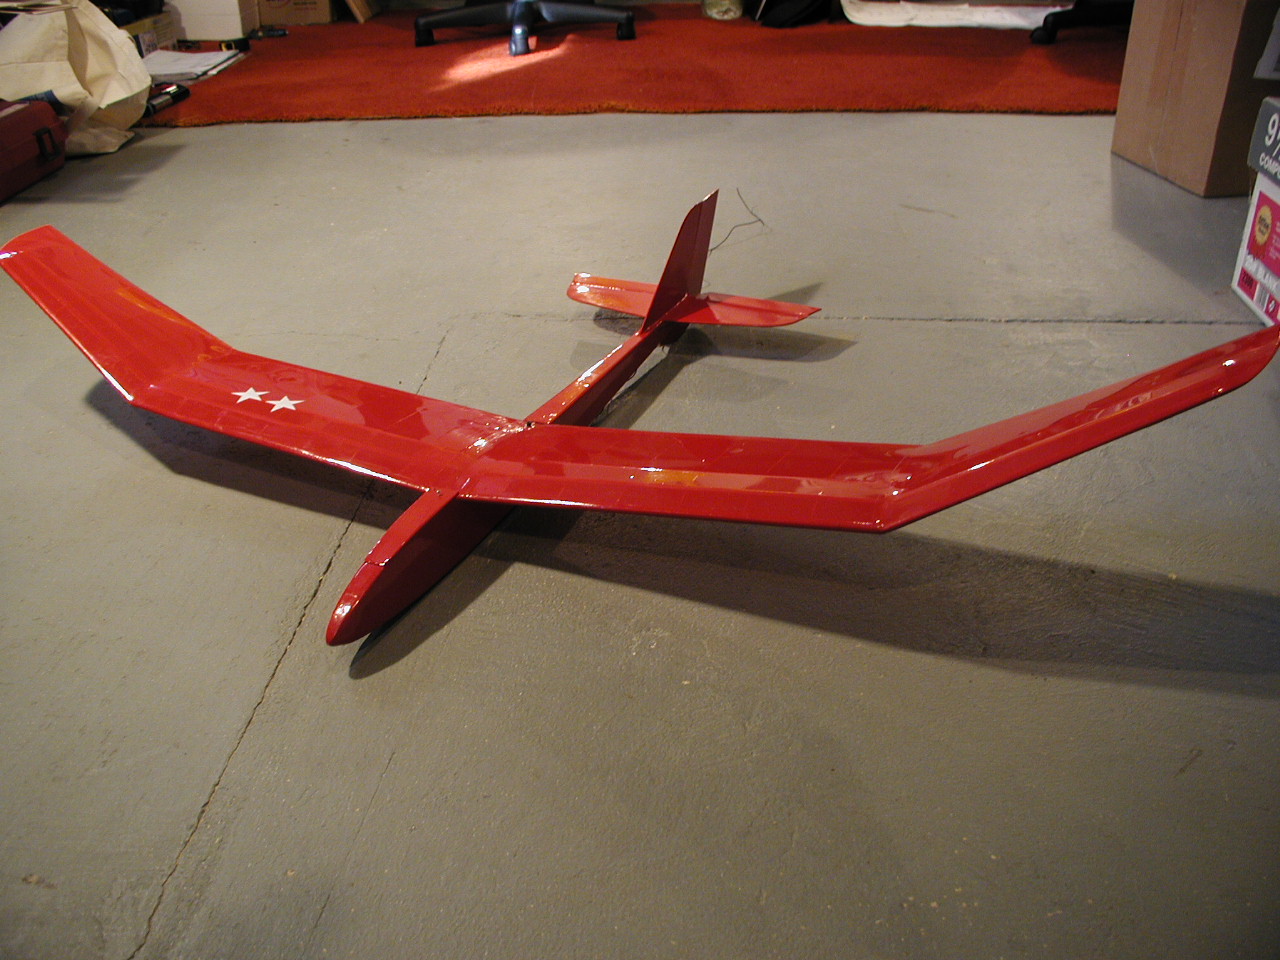
The Firefly is now finished. It has a 42-inch wingspan and weighs 350
grams (12.3 oz) with a 7-cell 700mAh NiMh battery. It is designed for
a Speed 400 motor, but I'm using an M100 motor in it.
This motor, with the Pixie 7 speed controller, provides plenty of
power. The current draw is 3 amps with 7 cells (8.4 volts) at full
throttle when measured on the ground in a static test. The power
requirements go down in real flight because the propeller is not as
loaded as during a static test, yielding flight times of more than 10
minutes, depending on how much trottle is used. One of the neat
things about this airplane is that I'll be able to build several
different wing configurations for it and play with different
controls.
The first few flights were strange. It didn't want to turn. I could
see the rudder cause the plane to slew to the side, but it didn't
bank. It turns out that I built the wingtips wrong. I have a
down-angle on the wingtips and the plans (unclearly) show up-angled
wingtips. The up-angle would have added additional up-thrust to help
bank the plane. I tried an experiment to add up-angle using cardboard
taped onto the end of the wings, but it flew no better. Time for the
first wing mods - adding ailerons. I added strip ailerons, each
controlled by a separate servo. Then I programmed my JR 783
transmitter to control each aileron. I'm able to do regular aileron
flying as well as add programming to turn the ailerons into flaps for
slower flying when landing.
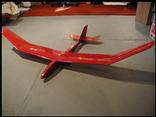
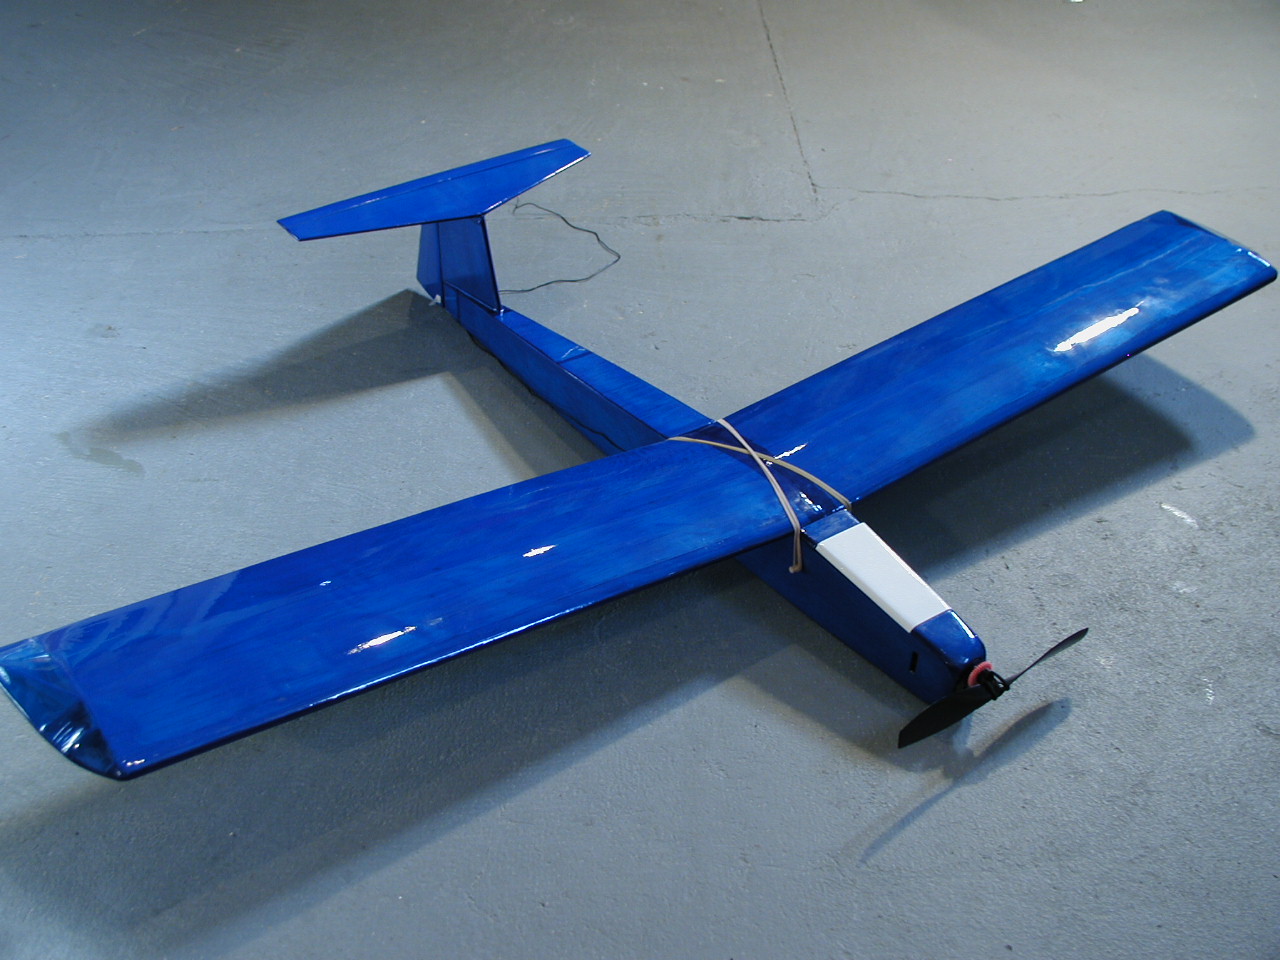
The fifth plane is one that I didn't build myself. It is a
hand-launch or hi-start launch glider that I purchased for $25 at an
auction held by the local flying club. It came with two servos, so I
had to add a receiver and receiver battery. In checking over the
plane, I was able to reduce tail weight by changing the control rods.
It can be hand launched (called a Hand Launch Glider or HLG), or it
can be launched with a large (and I mean large) sling shot-like rubber
band called hi-start. The Tercel has a wingspan of 48 inches and it
weighs 301 grams (10.5 oz) with a 4-cell 270mAh NiMhbattery.
After practicing a while, I find that I can hand launch to
altitudes of about 40 ft. A hi-start, depending on its construction,
can achieve altitudes of 100 - 300 ft. The glide slope on this plane
is much greater than the other planes. It is neat to watch it
silently glide by for a smooth landing on the local soccer field. I
can't wait until spring when the thermals return to Maryland. Tercel
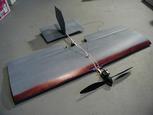
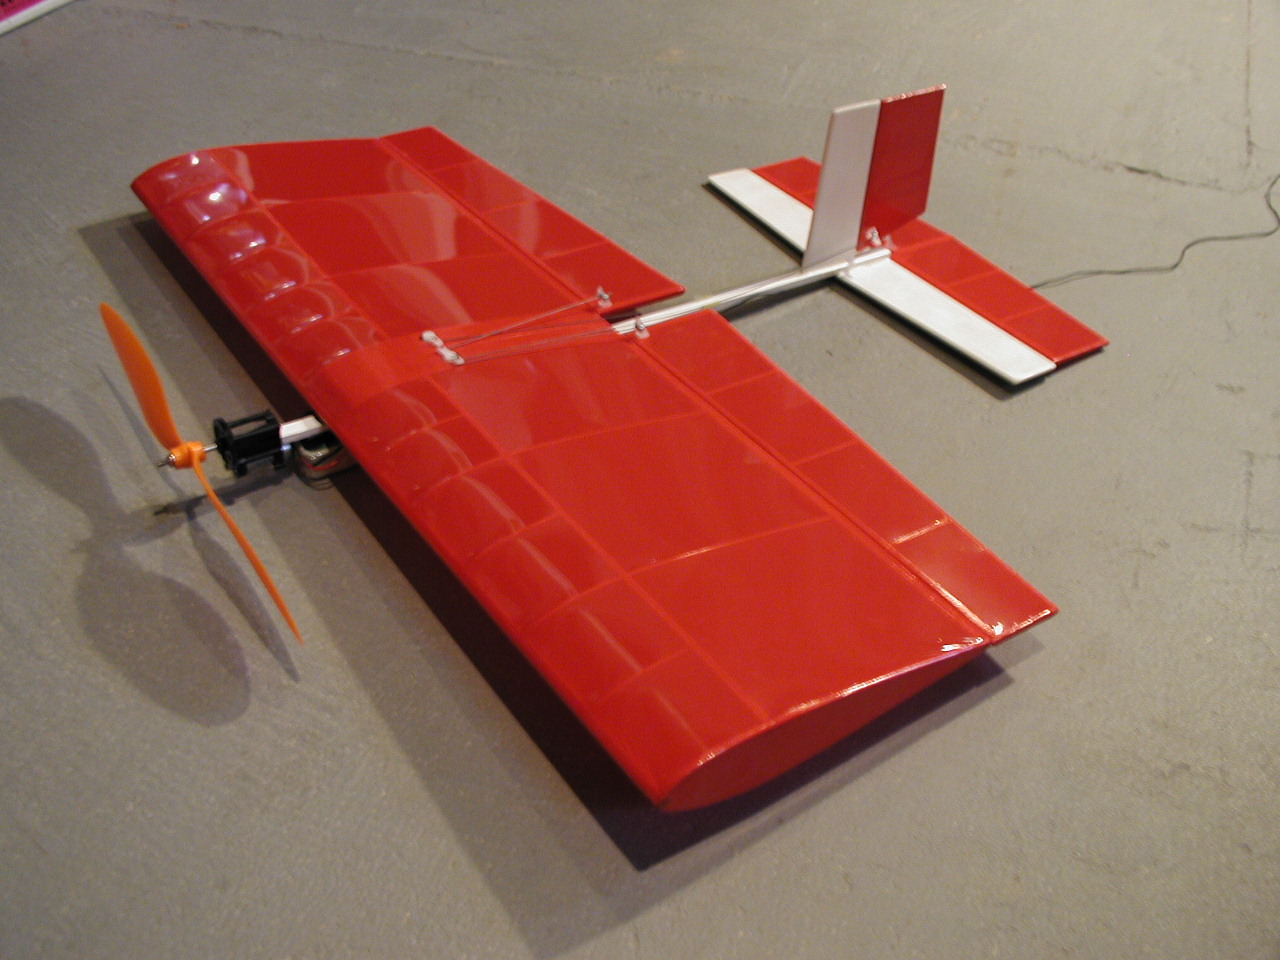
The most recent plane is the And_Now. It is functionally similar to Tiny in that it has ailerons and elevator control. It is made from the foam (called Depron) that is found in the core of art construction board, also called Sturdy Board. The foam is acquired by soaking the board in water until the adhesive holding the cardboard backing loosens. It is quite durable and aerobatic. I'd recommend it as a good aerobatic trainer. It cost me about $5.00 to build. It feels weird to add $100 of electronics and motor to a $5.00 airframe.
It is very durable - surviving crashes and hard landings quite well. Even if the wing is cracked, a little glue and clear packing tape has the wing ready to go again.
More photos on the construction of this plane will follow.

1/2/02
For Christmas, I received a Grumman HU-16 Albatross. It is the flying
boat that the US Coast Guard uses. In fact, the box label shows the
Albatross with the Coast Guard color scheme. It is an ARF, with the
fuselage made from fiberglass (nice hull form) and a foam wing with
balsa skin. I'll have to cover the wing, add motors and controls, and
color scheme. It should be an interesting plane to fly!
House Fly
1/25/02
I just started building a kit of an indoor helicopter
called the House Fly.
The box is 10 x 6.5 x 2 inches! The rotor diameter will be 13 inches
and the overall length will be 19 inches. Here's the completed House
Fly, ready for its first flight!
I've created a separate House
Fly web page. There, I describe its assembly, testing, and flying. So
far, I've been able to get it "light on its skids". There's been some
air under the skids, but not for very long and certainly not very
controlled. Flying helicopters is hard! It will be interesting to
see how long it takes me to be able to hover in one spot.
Piccolo

|
Piccolo and House Fly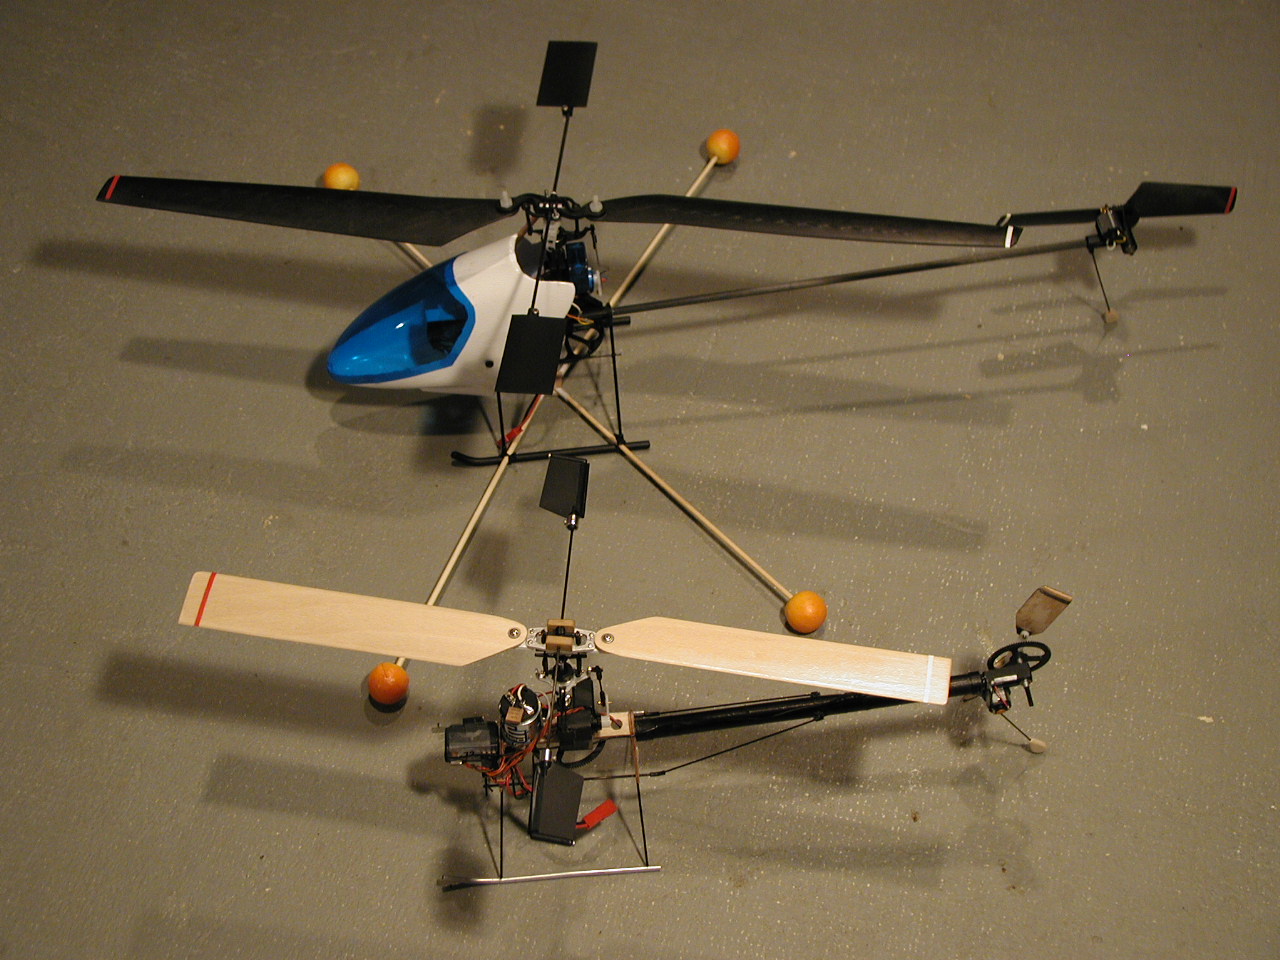
|
3/20/02
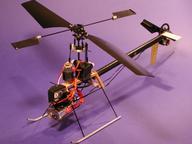
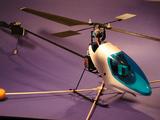
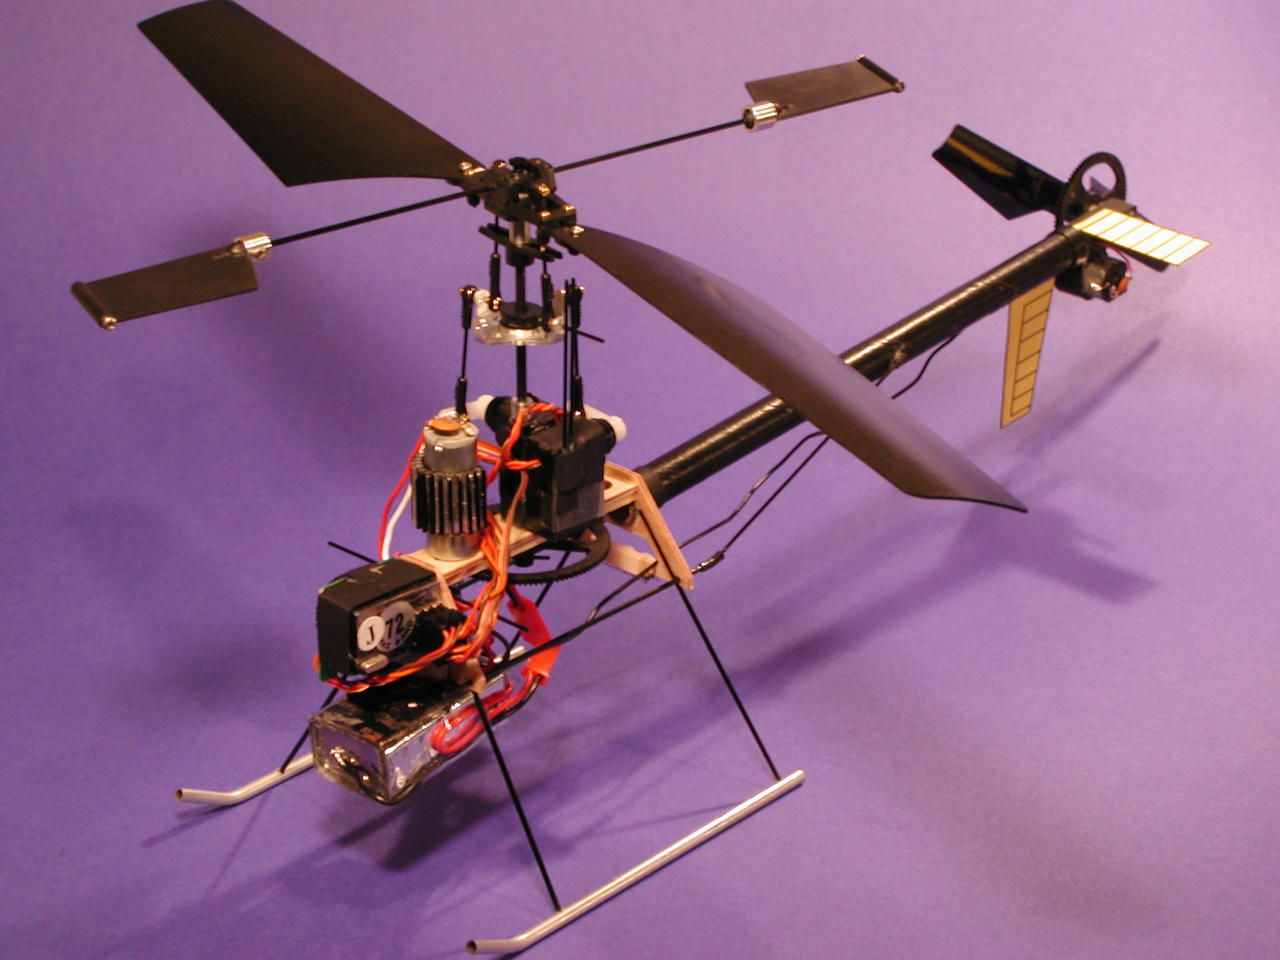
The Piccolo is another indoor helicopter, although larger than the
House Fly (see second photo of them together). It has a rotor
diameter of about 20 inches. I bought this model from someone on the
EZone bulletin board. It was already
assembled and needed a receiver and main rotor motor. I added an
Orion Elite Modified motor instead of the speed 300 motor that is
normal for this model.
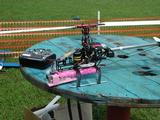
It has taken me a while to begin to adapt to flying this model. It has slightly different flight characteristics than the House Fly. Its larger size makes it easier to take outdoors for flying on calm days. The training gear is shown in the photos above. The Piccolo has a higher center of gravity than the House Fly and it has a tendency to fall over on its side, which is not good for the main rotor drive system and blades. The training gear helps keep it stable. I made the training gear from bamboo skewers connected to a center junction that I made from scrap balsa and rolled tubes of paper. The friction fit of the bamboo in the paper tubes is enough to keep them from coming apart. The balls on the end are foam balls that are sold in arts and crafts stores as decorative fruit (these looked like peaches).
The Ikarus bulletin board is dedicated to discussions of the Piccolo and other Ikarus helicopters. It is a good resource if you're starting to fly one of their helis.
More info on tuning, balancing, and modifications to my Piccolo is
available on my Piccolo page.
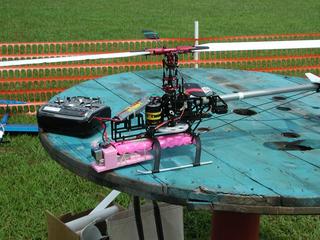
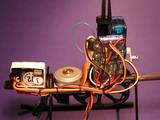
I purchased a second Piccolo to experiment with various options. The
first option is a brushless motor from a CDROM drive (see the CDROM page for details on the motor). Details
on the experiments with this heli are on the Piccolo Brushless page.
The second Piccolo has been modified with the addition of the Ikarus
collective pitch (CP) kit. Some details are on the CP Piccolo web page.
I also have an Eco 8 helicopter (1 meter rotor diameter) and have been using
it to do aerial photography. Details of the camera mount are on the
Eco8 web page.
Piccolo with brushless motor
Eco8