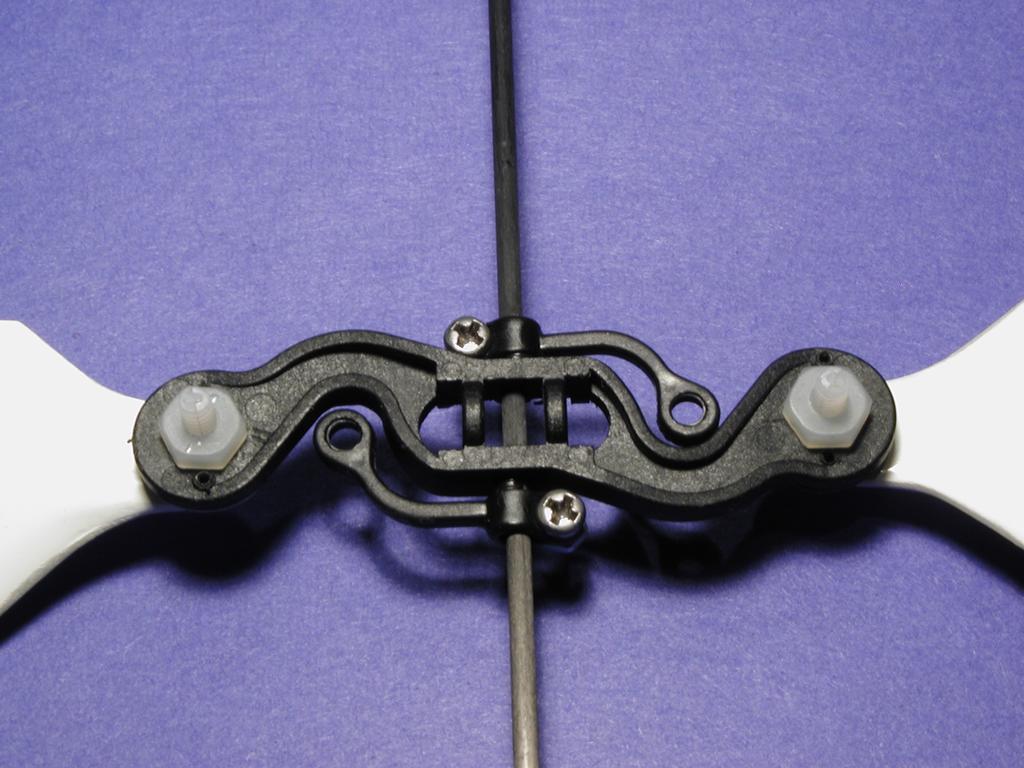
 Sight along both flybar paddles and adjust their mounts until they are
even with each other. You should not be able to see the body of
either paddle when they are properly aligned with each other.
Sight along both flybar paddles and adjust their mounts until they are
even with each other. You should not be able to see the body of
either paddle when they are properly aligned with each other.
Click on any photo for a full size image.
Ikarus discussion board - Discussion of Ikarus models, including the Piccolo.
Paul Goelz's web site - Paul has a very nice site explaining the work he has done with his Piccolo.
Christian's web site - Piccolo pilot locator and english installation instructions and photos on the collective pitch kit.
Colin's RC Heli site - A nice site with lots of info on helicopters (primarily gas). It contains a detailed procedure for learning how to fly helicopters.
I recently cut the main rotor blades according to the directions on Paul Goelz's web site. The idea is to increase the main rotor speed to reduce the load on the motor through reduced drag and to provide greater gyroscopic stability.
A better set of main rotor blades are the Hornet blades. They are fiberglass and look very nice. They appear in the photos on my Piccolo web page (see link below). The photos above show the stock black plastic main rotor blades.
I have never used the stock motor that comes with the Piccolo. I bought my Piccolo from someone else and didn't get a motor in the deal. That wasn't a problem, because I had an Orion Elite Modified motor that I planned to use.
My most recent project is to install a modified brushless CDROM motor on a second Piccolo. More details on CDROM motors are documented on a CDROM page. Details of the testing and results are on the Brushless Piccolo web page.
I've since modified the second Piccolo with the Ikarus collective pitch (CP) kit. A few details are on the CP Piccolo web page.
It takes time to balance and tune a helicopter - more so than a fixed wing airplane. Here's a process I've found that works for me.
I bought a pair of the Hornet fiberglass blades and am using them on my Piccolo. They are very nice blades, flat bottom, and result in a higher head speed. I had cut my stock blades (8x3) and the resulting head speed for hover was about 1150 rpm. The Hornet blades resulted in a head speed of 1250 rpm. The Hornet blades appear in the photos below.
Unmount the rotor head and make sure the rotor shaft turns true and smoothly.
Sight along both flybar paddles and adjust their mounts until they are
even with each other. You should not be able to see the body of
either paddle when they are properly aligned with each other.
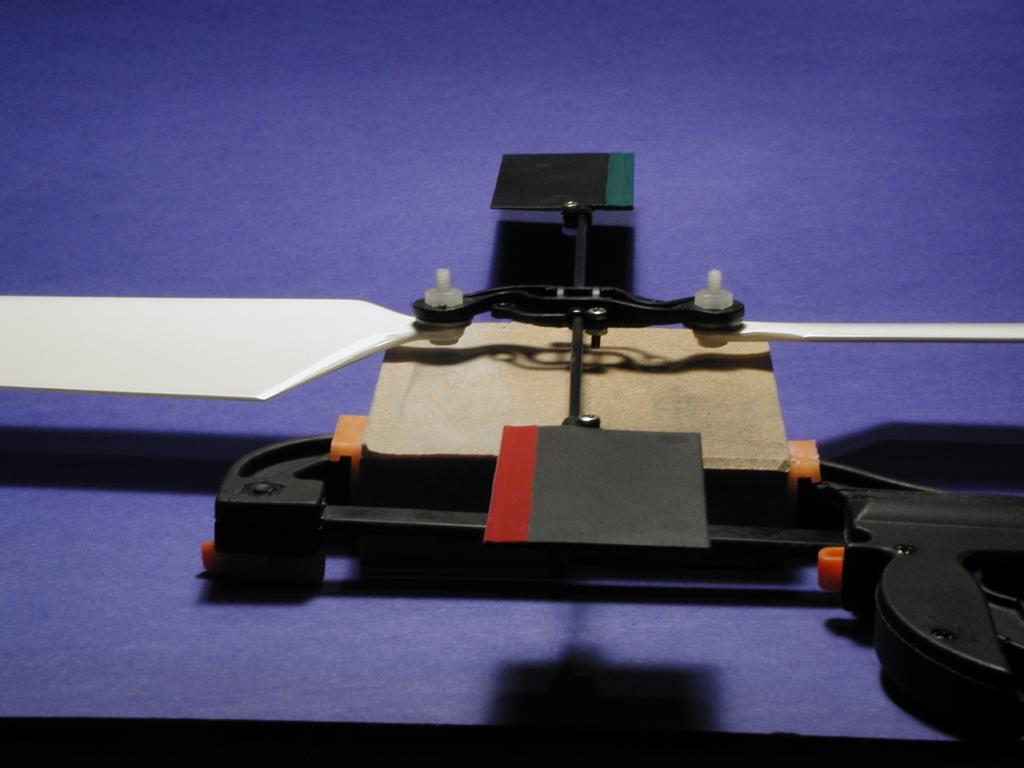
The flybar paddles should be straight off the end of the flybar itself. Sometimes the paddle mounts get a slight bend and the paddles are higher at their tips than at their root. Bend them until they are in line with the flybar itself. This step can be done at the same time as the prior step of making the paddles even with each other.
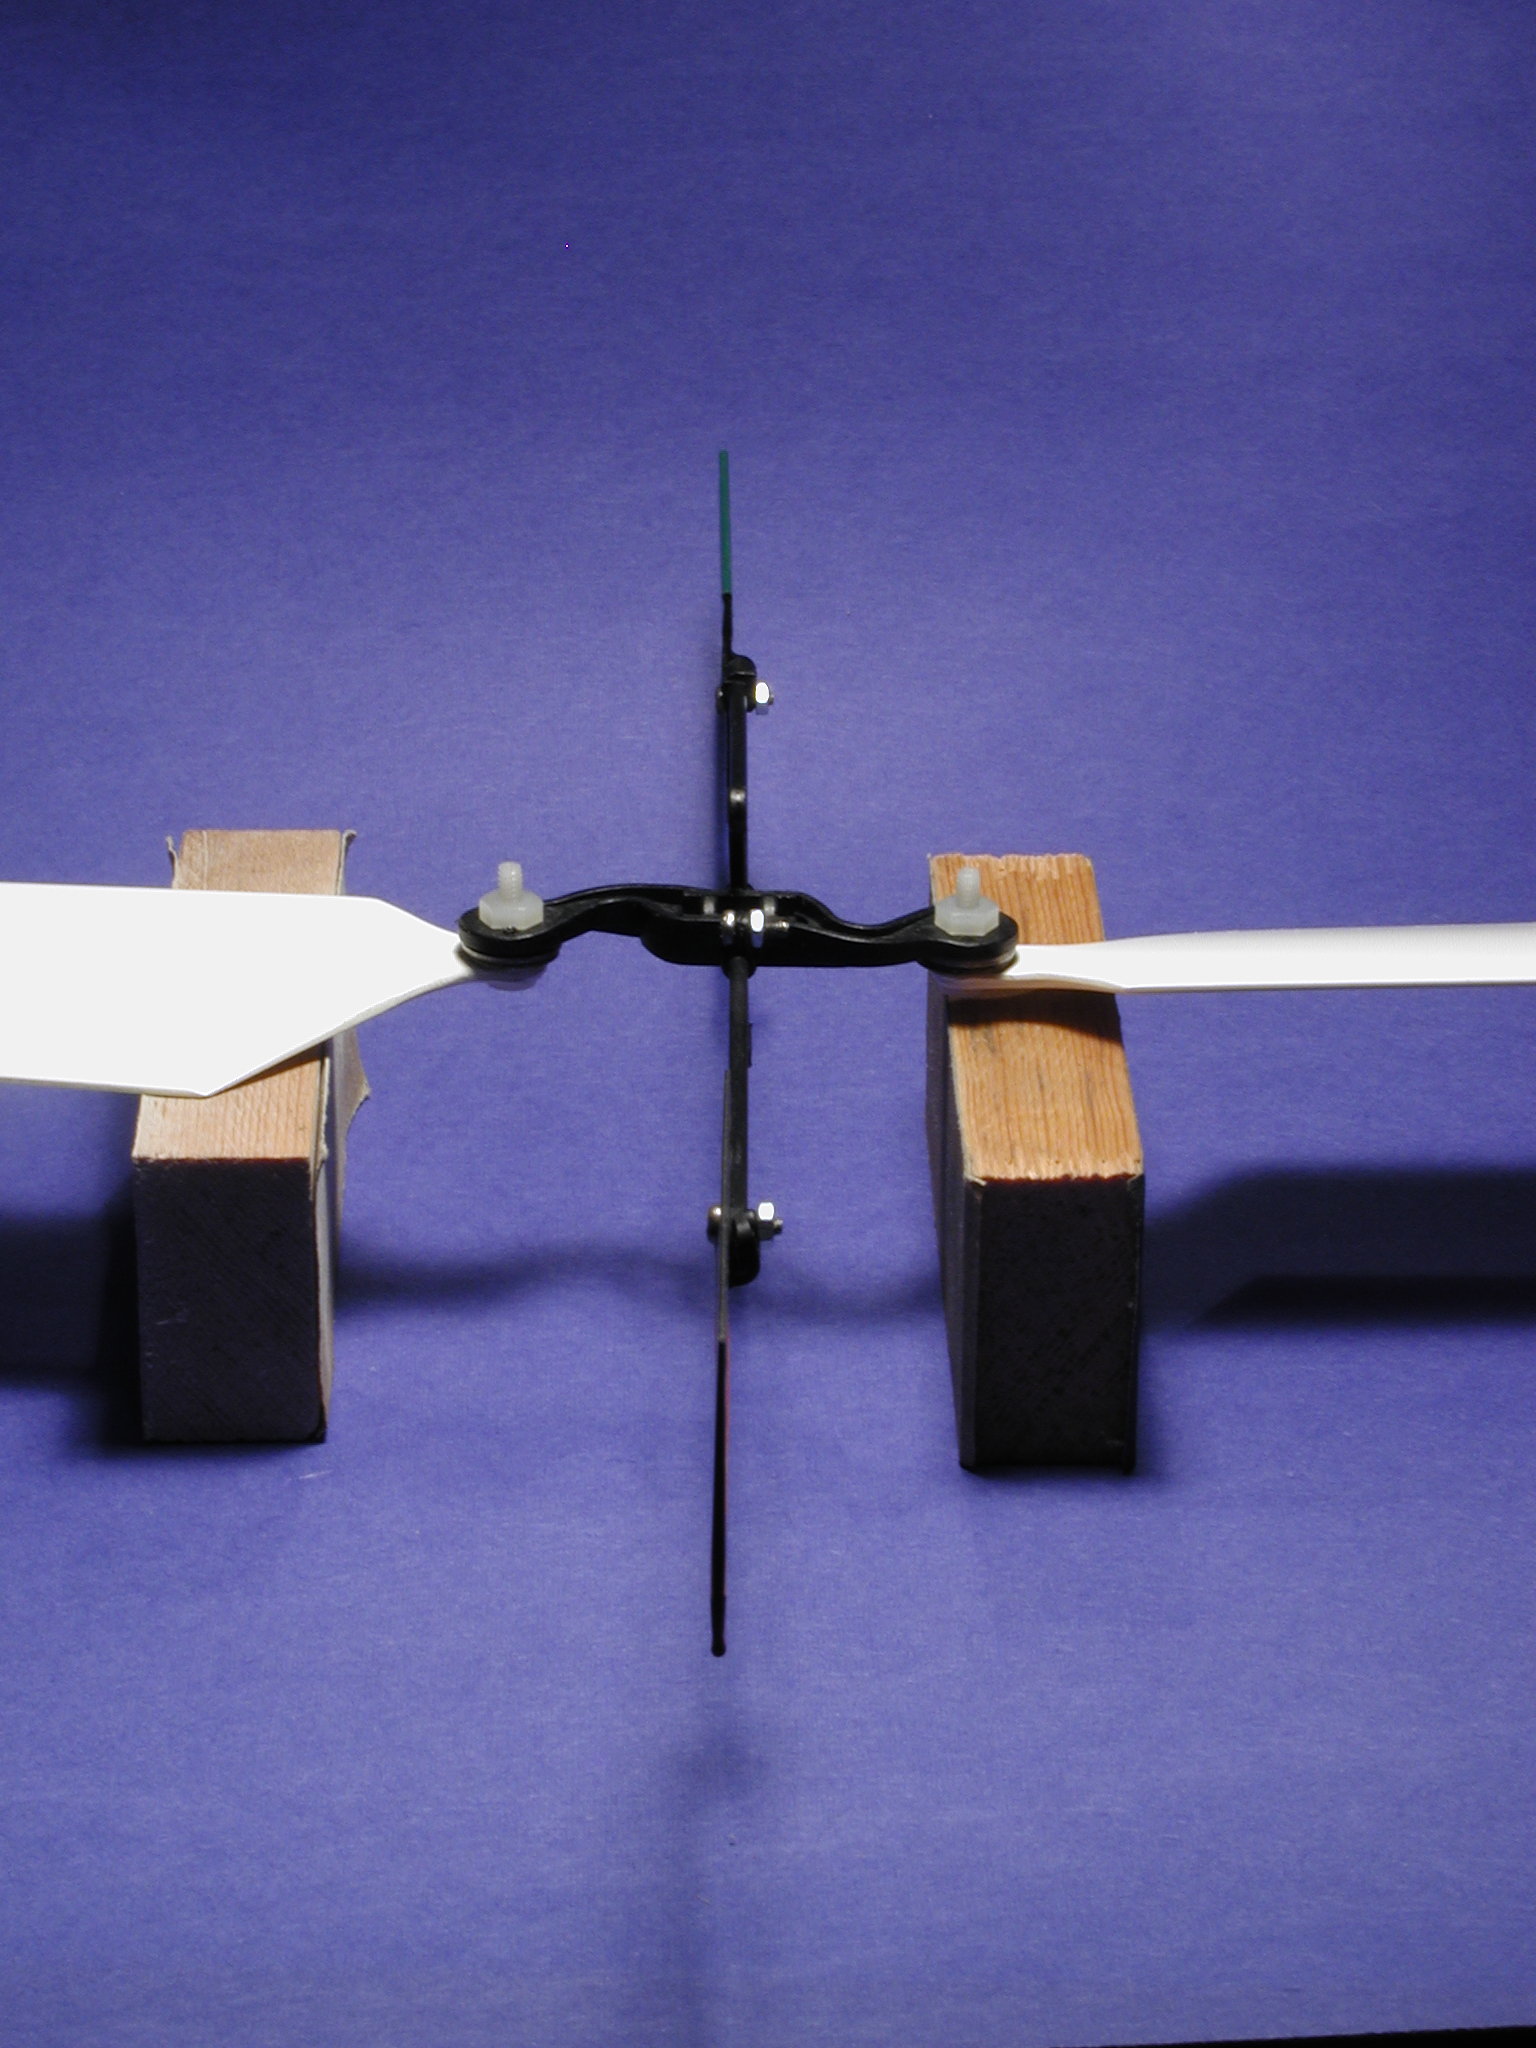
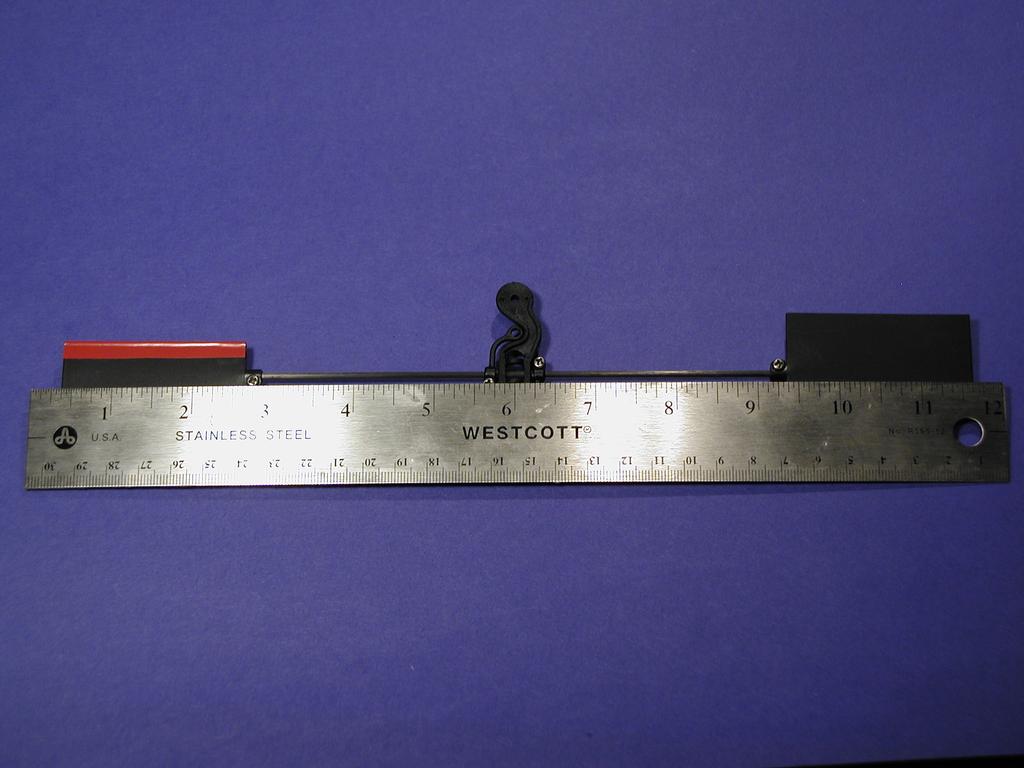
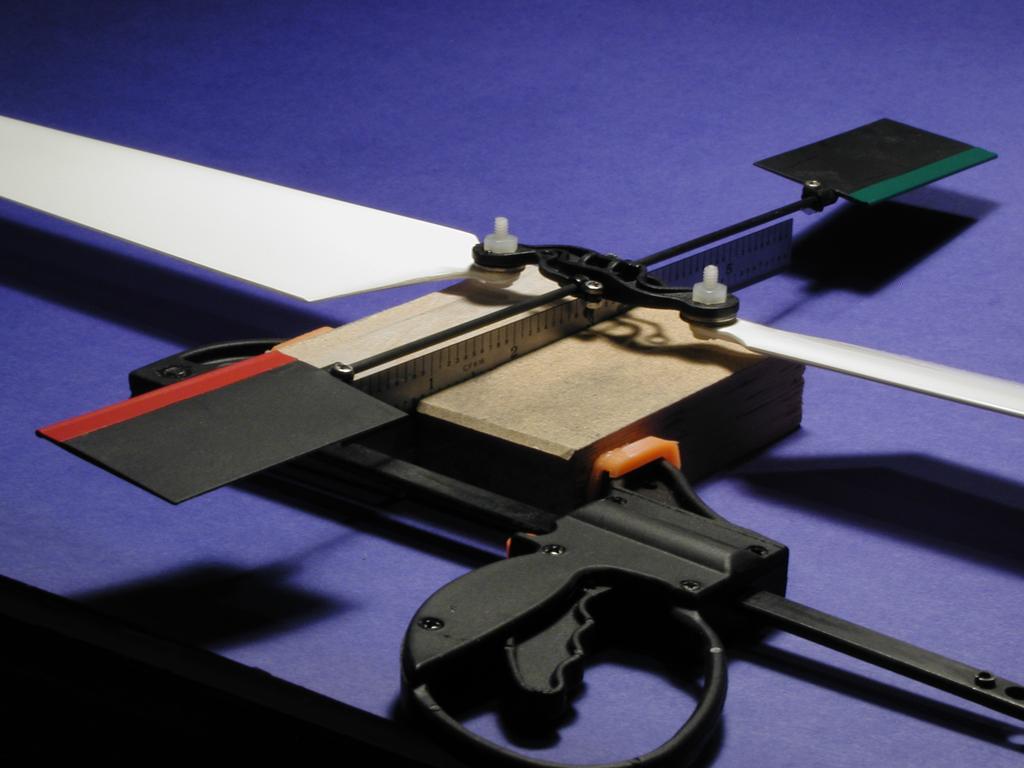
Center the flybar on the rotor head. I use a 12-inch ruler and align
the 6-inch point with the center of the roor head. I then check that
the paddles are the same distance from the center. For the Piccolo,
the inner edges of the paddles are 3-3/8-inches from the center.
On my flybar paddles, I've added a piece of .055-inch CF rod to the leading edge and covered with tape. When it is aligned properly, I add a little thin CA (a drop in the edge of the tape) to adhere the CF rod to the paddles so it won't shift position. This provides a rounded leading edge and adds a little more stability. The colored tape allows me to easily check the tracking of the paddles with respect to each other. I make sure that the tape is the same color as the trailing blade, since that is the blade that the paddle controls. The tape also guarantees that I'll reassemble the rotor the same after any maintenance (or repairs - ugh). Being able to duplicate the assembly is important once you've done a careful alignment and have eliminated all the vibration.
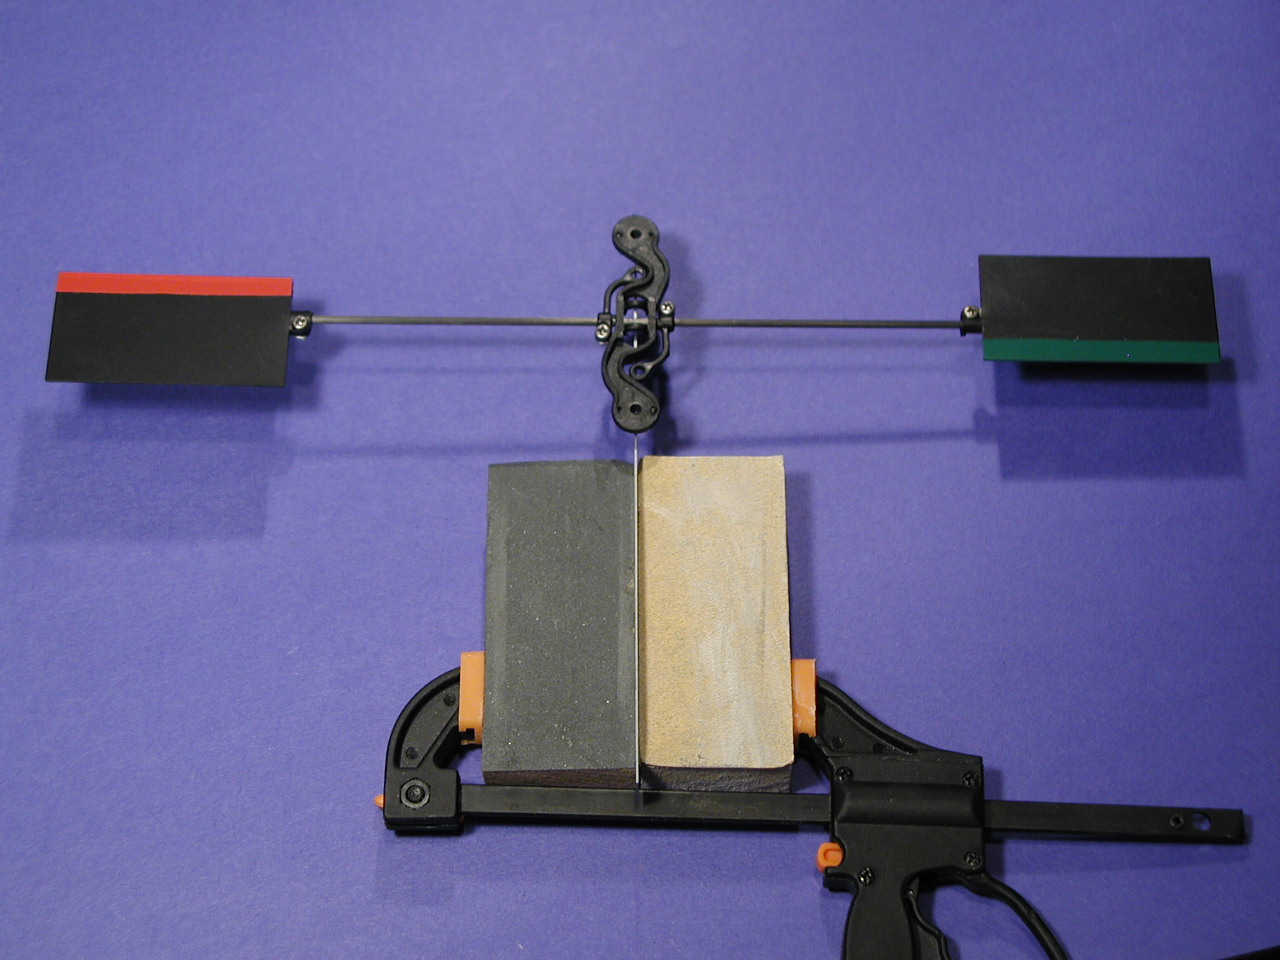 Carefully balance the flybar. I use a thin ruler clamped between two
blocks as a balance point. Add a piece of tape to the light paddle so
that it becomes the heavy paddle. Trim a small piece of the tape
away with a sharp knife and check the balance. Continue trimming
small pieces of tape off the edge of the tape you added until the
flybar balances.
Carefully balance the flybar. I use a thin ruler clamped between two
blocks as a balance point. Add a piece of tape to the light paddle so
that it becomes the heavy paddle. Trim a small piece of the tape
away with a sharp knife and check the balance. Continue trimming
small pieces of tape off the edge of the tape you added until the
flybar balances.
Mount the rotor head and flybar assembly on the heli and spin it with the motor. There should be no vibration. Carefully check that there is no downdraft or updraft of air while the blades are spinning. Any air movement is an indication that the flybar paddles are not centered correctly. (Be very careful of your hands around the spinning flybar paddles - they have sharp edges. It also helps to tape or clamp the heli to the table to prevent accidents.) When the rotor head and flybar is spinning, it should have no vibration and both flybar paddles should track evenly. Check the rotor disc of the flybars to make sure they are tracking even. I use colored tape on the leading edge to make it easy to check which one is high. Do not proceed until you have eliminated all vibration.
 Remove the rotor head from the heli. Add the blades to the rotor
head and check blade balance the same way as checking the flybar
paddle balance. Use the same tape procedure to make the light blade
heavier, then trim until the blades balance.
Remove the rotor head from the heli. Add the blades to the rotor
head and check blade balance the same way as checking the flybar
paddle balance. Use the same tape procedure to make the light blade
heavier, then trim until the blades balance.
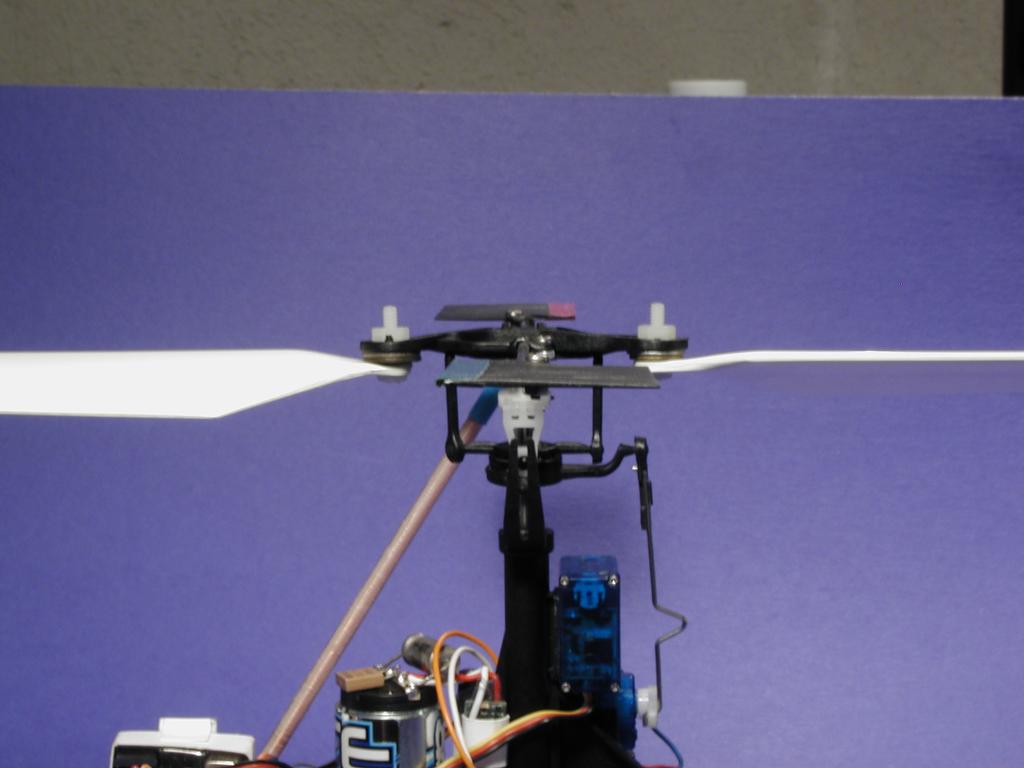
If the flybar lever grips become loose where they wrap around the flybar (as mine did), remove them and add a small drop of thin CA to the inside of the grip and let it dry. When the CA is dry, remount them on the flybar. Make sure they don't get glued shut and don't glue them to the flybar! The thin CA will add some thickness and provide a better grip to the flybar.
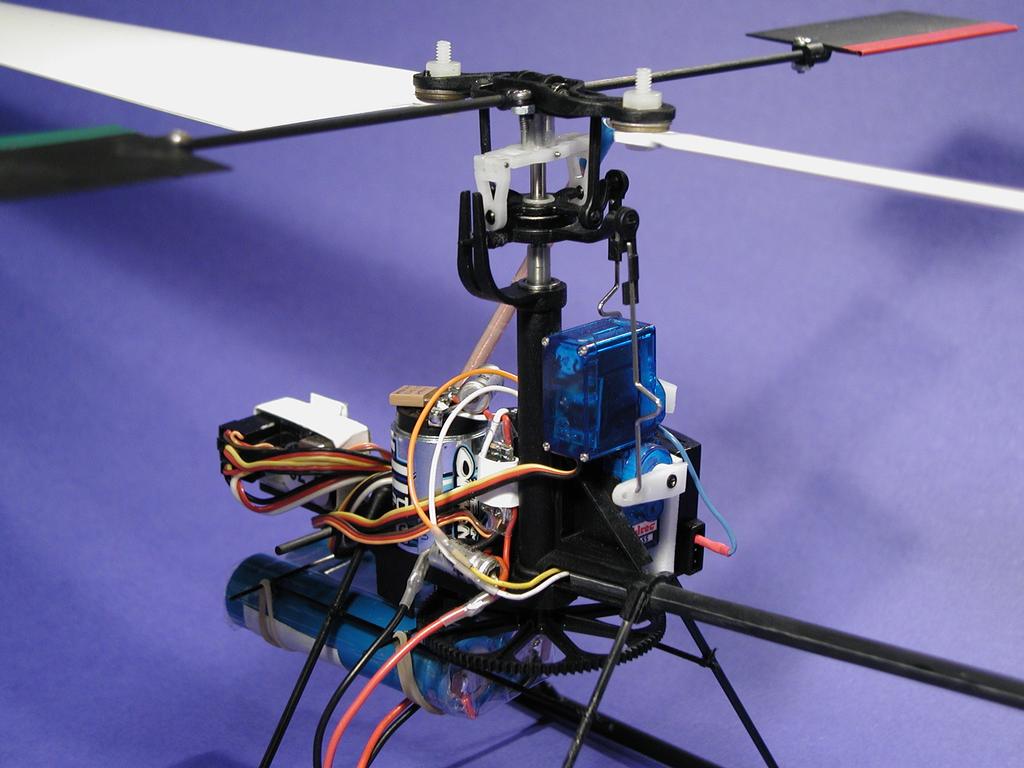
The Hornet blades are mounted with no modifications to either the blades or the Piccolo rotor head. I added two 3/16-inch ID washers to each blade mount to cover the stock mounting stud on the rotor head. Other people have cut off the mounting stud, which would save the weight of adding the washers. I used readily available metal washers. Other people have used drills or reamers to enlarge the mounting hole in the blade to fit over the blade grip mounting stud. I encircle the tip of each blade with colored tape that matches the color on the flybar paddle the is in front of the blade (that's the paddle that controls that blade). The colored tape will be used in the dynamic balancing described below.
 I added two #0-80 allen-head set screws to each blade mount to allow
fine adjustment of the blade pitch. A pair of washers are used as
spaceres on each blade mount instead of reaming out the blade mounting
hole. The washers also function as a bearing surface for the allen
screws.
I added two #0-80 allen-head set screws to each blade mount to allow
fine adjustment of the blade pitch. A pair of washers are used as
spaceres on each blade mount instead of reaming out the blade mounting
hole. The washers also function as a bearing surface for the allen
screws.
Back out both allen screws so that the blades are flat on their mounting surfaces (or washers if you're using them). Adjust the mounting bolts so they have the same tightness. I check the mounting bolt tension by feeling how much force is required to move the blade on the mount. If you push on both blades from the side, one blade will move before the other. With a little practice, you can tell when one blade is tighter than the other.
 Now mount your rotor head on the heli (which you should have clamped
or taped to a work surface), turn on your transmitter, set the
throttle at minimum, and connect your battery. Keep your fingers and
head out of the way. Increase throttle until the main rotor is
turning steadily at low speed. Watch for vibration and shut down the
throttle if too much vibration occurs (which means that something else
is wrong - go back and recheck the static balance of the rotor parts).
Wear safety glasses to protect your eyes!
Now mount your rotor head on the heli (which you should have clamped
or taped to a work surface), turn on your transmitter, set the
throttle at minimum, and connect your battery. Keep your fingers and
head out of the way. Increase throttle until the main rotor is
turning steadily at low speed. Watch for vibration and shut down the
throttle if too much vibration occurs (which means that something else
is wrong - go back and recheck the static balance of the rotor parts).
Wear safety glasses to protect your eyes!
Look at the rotor disc when viewed from the side. You should see one rotor disc and not be able to see the two different colors of tape on the ends of your rotors. Slowly increase to 1/2 throttle while watching the rotor disc from the side. You should continue to see one rotor disc. If there's a lot of vibration, reduce throttle and start more slowly and check the rotor disc. You may need a light shining on the tips of the rotor blades to see the colored tape.
As you increase throttle, you may see one blade is flying higher than the other (you'll see two rotor discs, one with the color of one rotor's tape and another with the other color of the other rotor's tape). Make note of the color of the lower blade (rotor disc). Shut down the main rotor and disconnect the battery. (Yes, it is a pain to disconnect the battery, but you eliminate the risk of hitting the throttle and having the heli self-destruct and possibly injure you - yes, I've learned that lesson from experience, although without injury.) Loosen the blade mount of the blade which was lower (remember its color?) and tighten the rear blade pitch screw 1/2 turn (increasing its pitch). Retighten the blade mounting screw so it is the same as the other blade mounting screw. Repeat the rotor disc check and adjusting the pitch screw of the lower blade until both blades are tracking at the same height. The heli should be running smoothly now.
I've found that if one blade is not properly adjusted, it may be smooth at low RPM, but will increase in vibration abruptly at some higher RPM. I've even had the blades adjusted such that they were fine at lift-off, but started viloent vibration as RPM was increased to achieve hover out of ground effect. When this happens, look for different blade mounting bolt tightness or different blade pitch. I've had one blade be the lower blade until a specific RPM, at which point the blade quickly transitions to being the higher blade and heavy vibration starts. Tighten the blade that is higher when the vibration occurs. If mounting tension is the same, adjust the pitch.
If you're using the stock blades, they can be twisted to change the amount of wash-in at the blade tips. I've found that too much wash-in causes the blade to flutter, creating significant vibration. Twist the tip counter-clockwise, when viewed at the tip, to add more wash-in (reduce pitch) and twist clockwise to reduce wash-in (add pitch). Twist only one blade at a time and retest. I didn't do any twisting to the Hornet blades. The pitch adjusters allow me to precisely set the pitch of each blade. I think the pitch adjusters are preferable to twisting the blades, even for stock blades.
I've also noticed that the rotor has less vibration when mounted on the head a specific way. So I've added a drop of red paint to the swash plate and the control arm that is nearest to the flybar with the red tape. So now everything is color coded and I can re-assemble my Piccolo with the same results every time.
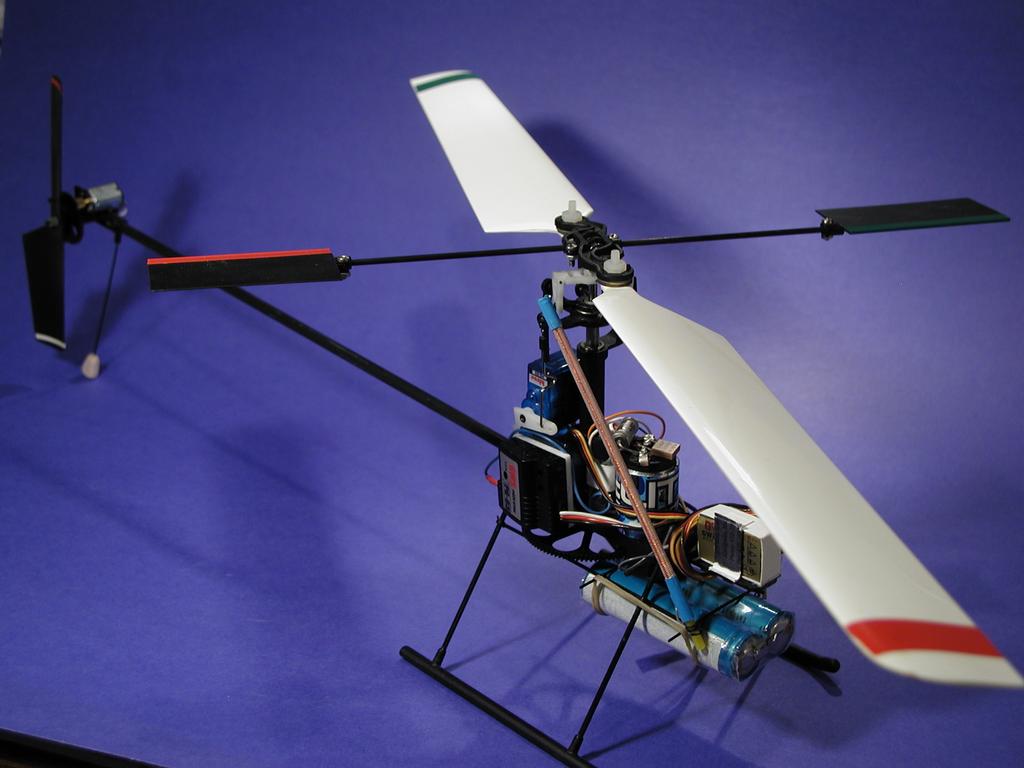
| Here are photos of my completed Piccolo without canopy. I've since moved the Azaar antenna. Instead of being attached to the forward landing gear strut, I've attached it to the rear landing gear strut. It seems to provide better reception there. |
|
|
The photos show the 1100mAh LiIon two-cell pack that I use. I get 10 minute flights from these packs. The cells are from old cell-phone batteries sold by Electronic Goldmine. Some of the cells I get from the cell phone packs are good and some cells are marginal - it pays to get a number of packs and test the cells.
A recent addition to my Picclo is the machined main gear from Warren Collins. It is very nice. The gear mesh is more constant as the main rotor turns, which I'm sure reduces the amount of friction.