Click on any photo for a full size image (1280x960, about 250-300KB).
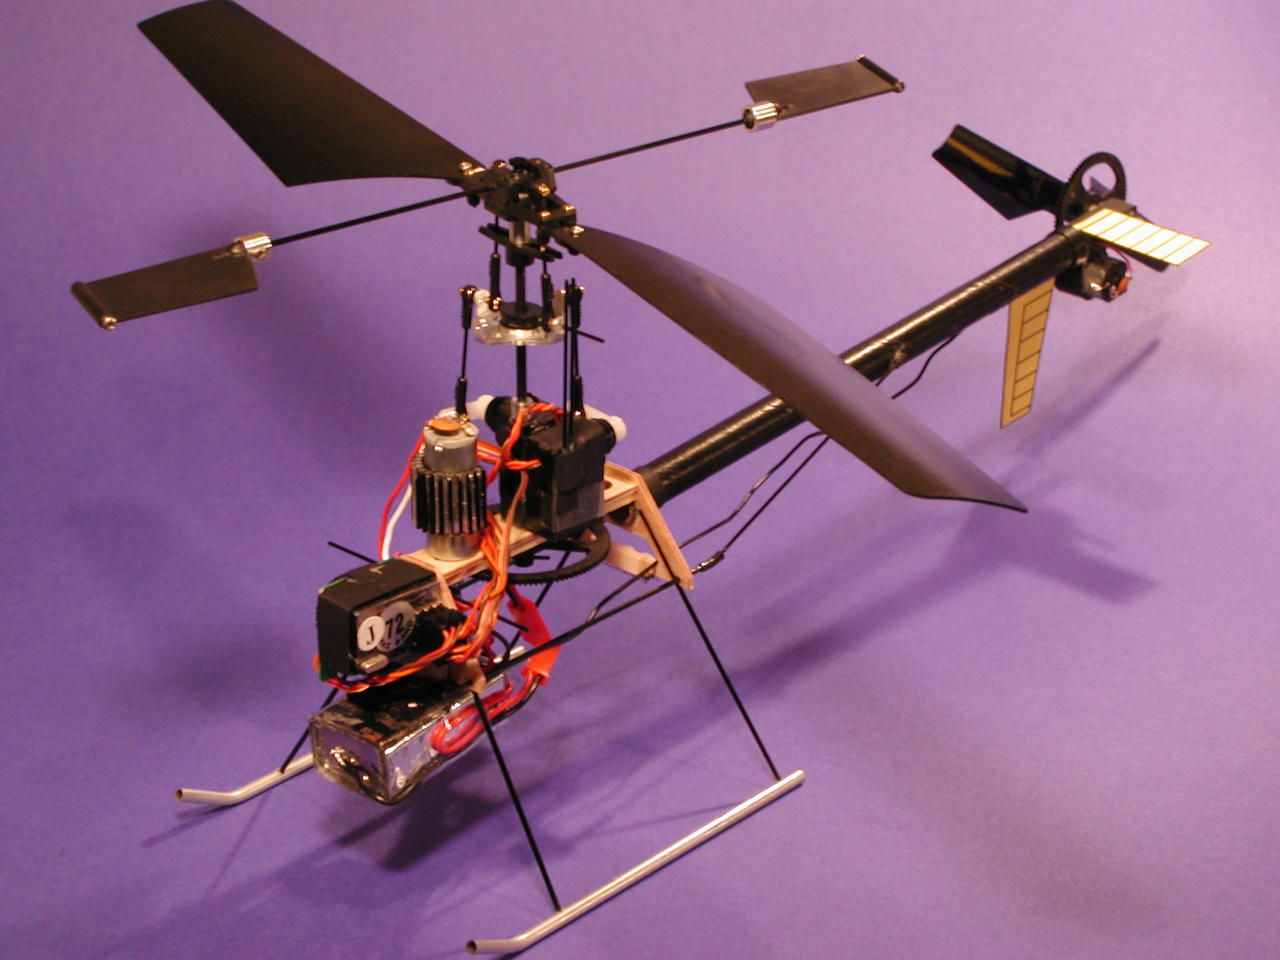
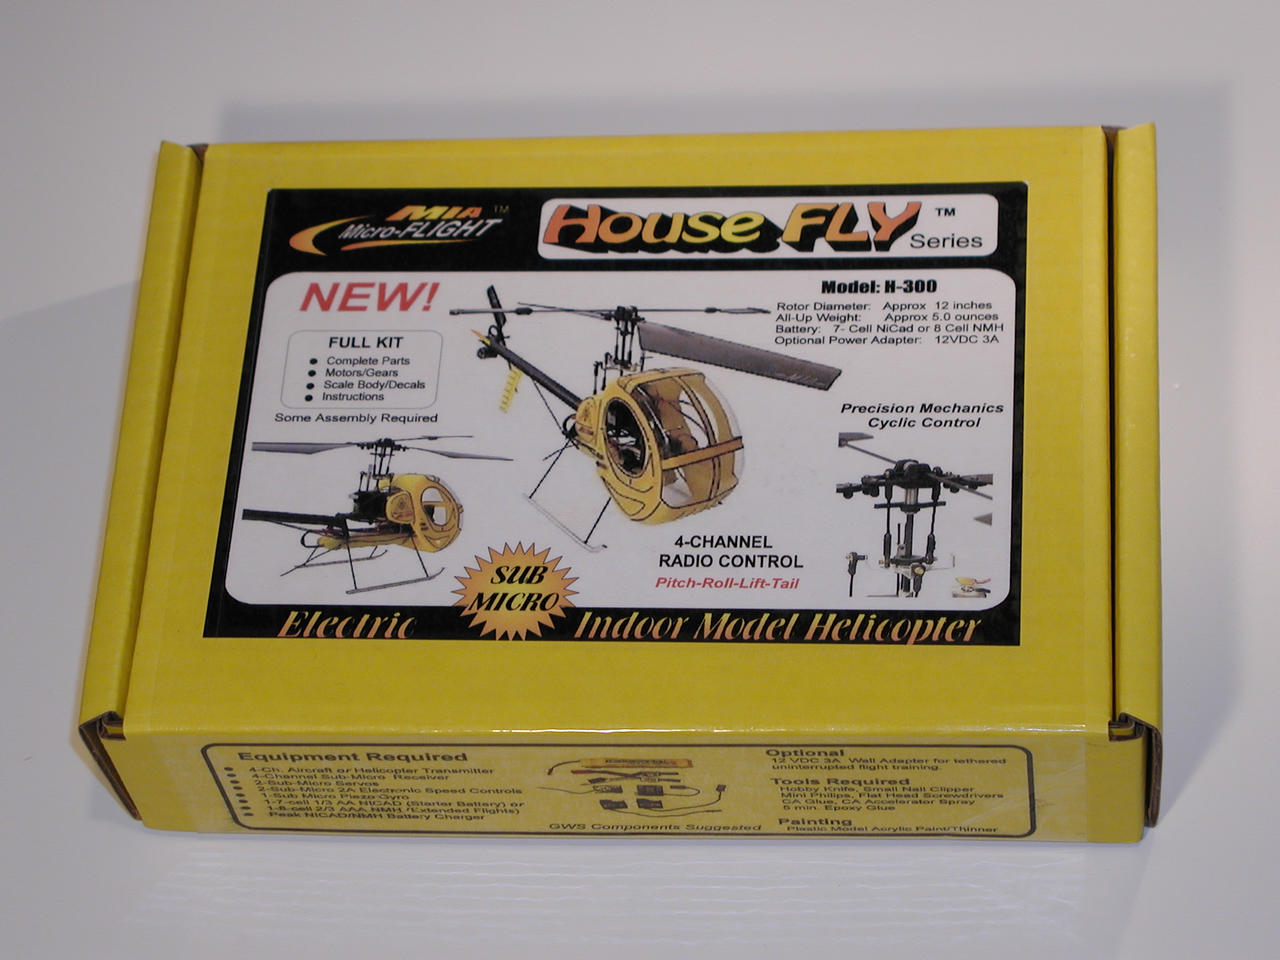
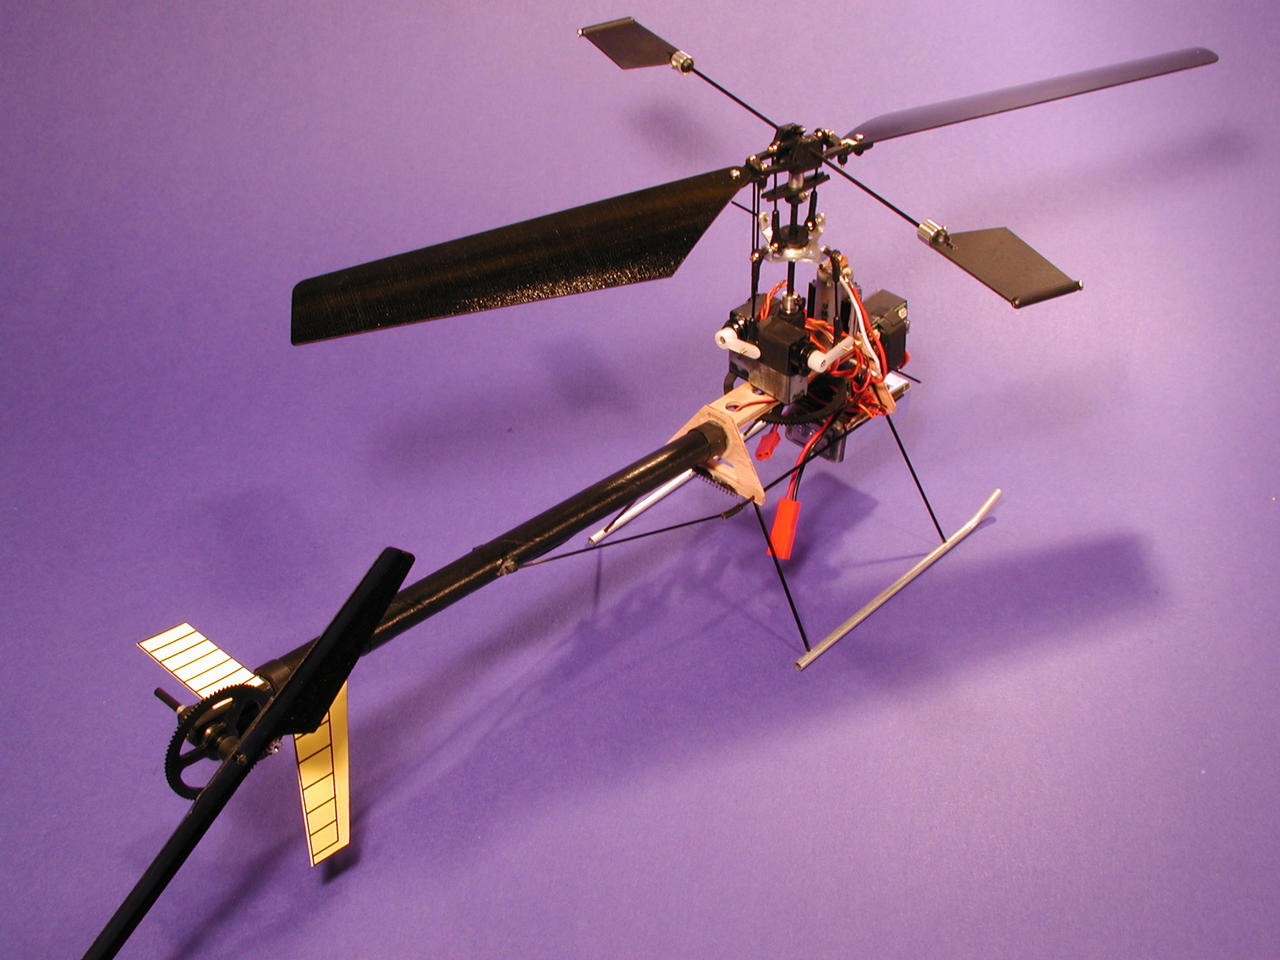
2/04/2002 Some days are too windy to fly outdoors and there isn't a good local indoor flying location, so I decided to try an indoor helicopter. The House Fly, from Micro-Flight is a new helicopter kit that looked interesting. Its rotor diameter is 13 inches. The entire helicopter without batteries weighs about 90 grams (3.1 oz).
The kit comes in a very small box: 10 x 6.5 x 2 inches! The parts are very well organized in separate plastic bags. You definitely need prior kit-building experience before tackling this project. There are a number of small parts and in some instances, you need to rely on your experience for proper assembly.
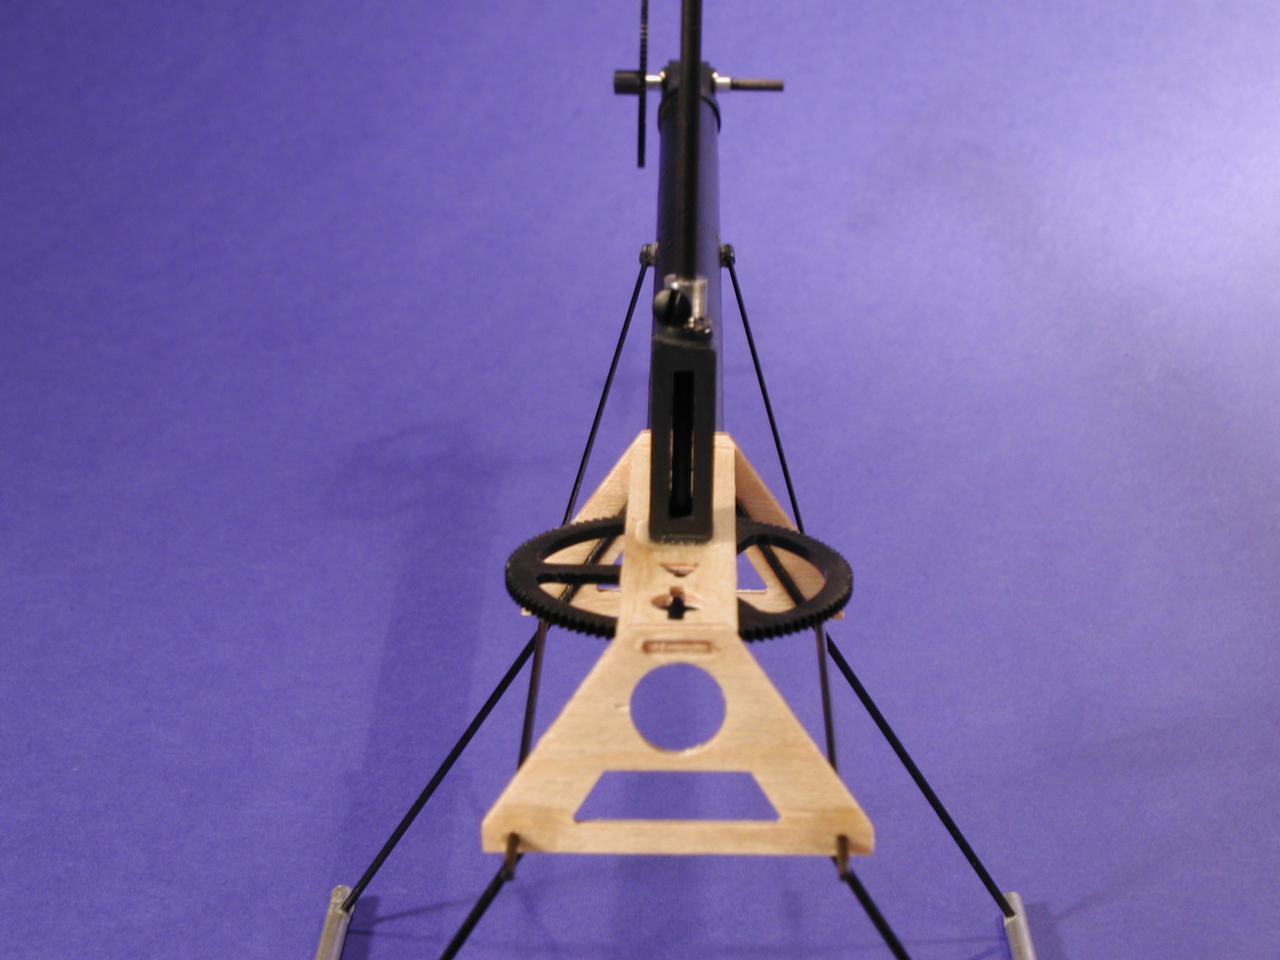
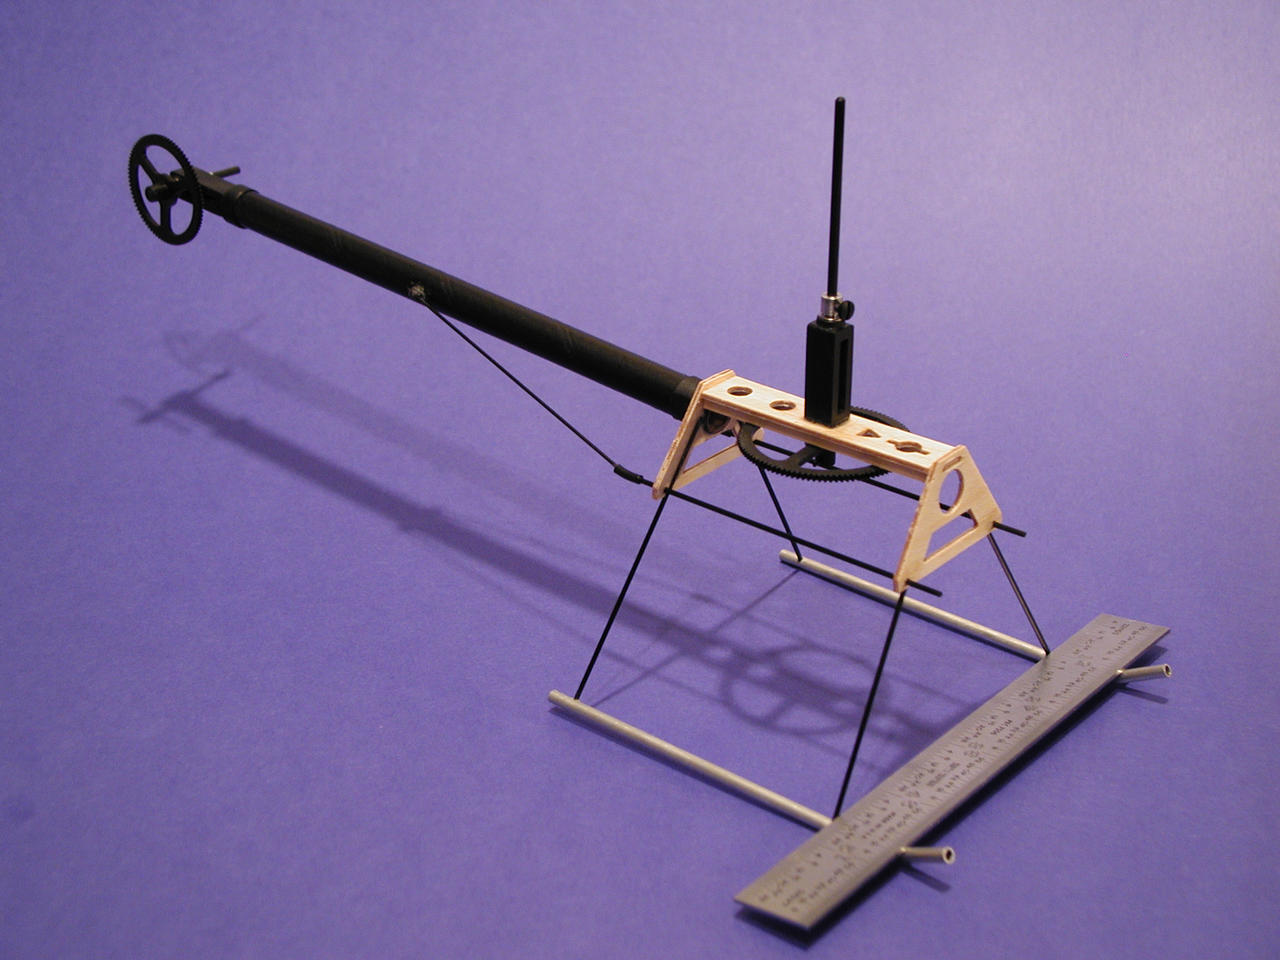
The assembly goes pretty smooth at the start. The basic frame is quickly assembled. It is important to make sure that the tail boom is properly aligned with the frame. Check the alignment by sighting from the front to the back. Also check that the tail rotor bearings are horizontal and that the tail boom is mounted at a slight upward angle. There is a 6-inch ruler on the front of the skids to hold down the front of the frame.
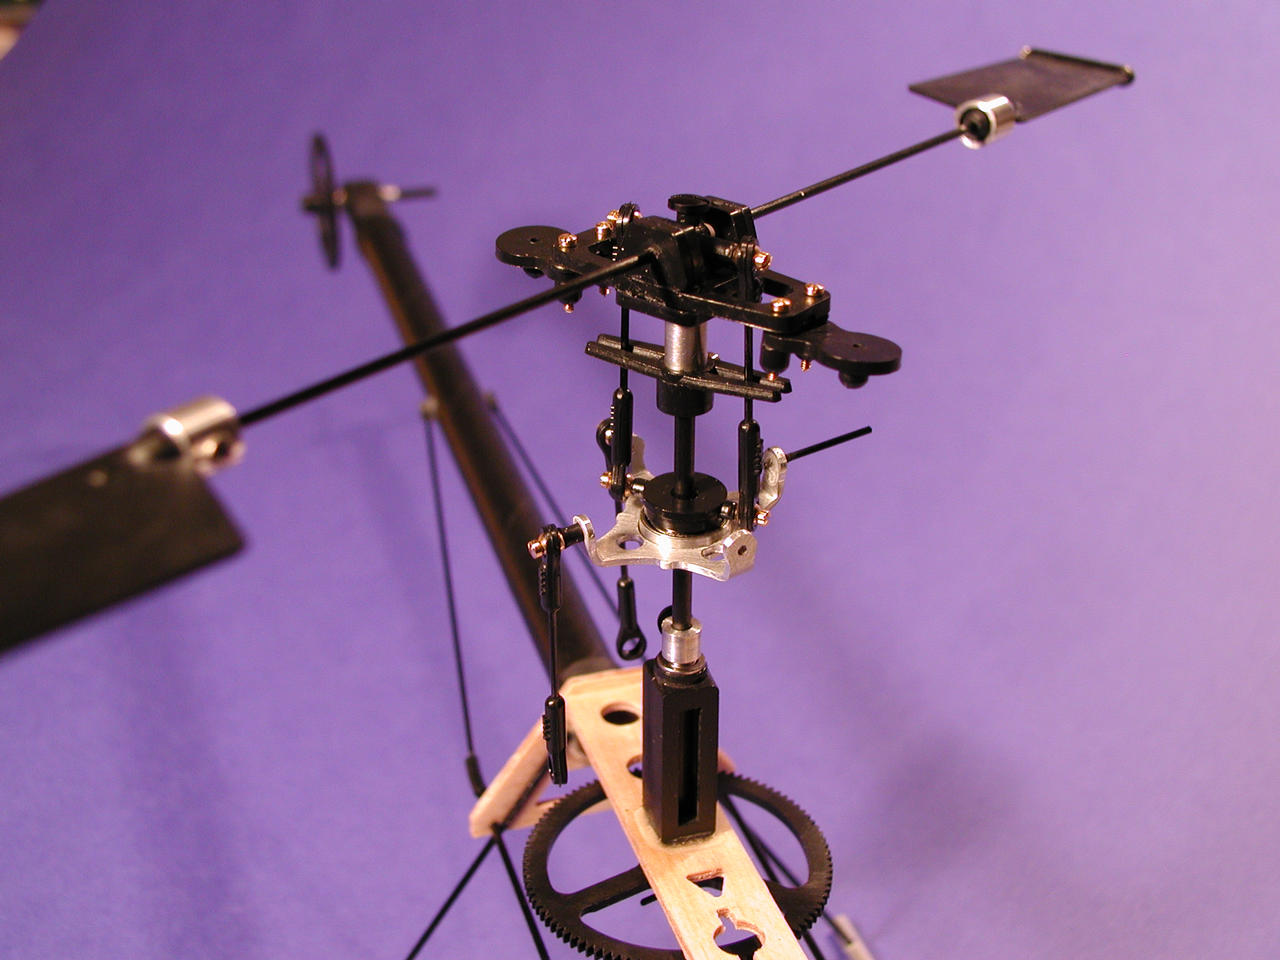
The main rotor gear, rotor shaft, tail rotor gear, and tail rotor shaft are then installed. The final assembly, properly aligned, looks like the far right photo.
The next step is to assemble the main rotor parts. There was one complication here - I didn't see how to assemble part of the swashplate. I experimented with two combinations and determined that the ball bearing for the swashplate should be mounted under the aluminum swashplate piece and that the black plastic upper half of the swashplate assembly should be carefully glued into the ball bearing. It is important to be very careful when gluing. Use a toothpick or similar tool to apply a very small amount of CA to the outside of the bearing when gluing to the aluminum swashplate. Use the same method for gluing the plastic upper half of the swashplate into the ball bearing.
Check that the bearing turns freely after the glue has set. If you get CA into the bearing (speaking from experience here), carefully extract the plastic part from the ball bearing. I used a small screwdriver to pry them apart. Soak the ball bearing in Acetone to disolve the CA. Don't soak the aluminum plate or the black plastic part. Then try assembling them again until it is assembled and turns freely.
Also make sure the main rotor shaft turns freely in its bearings. I didn't glue the main rotor gear to the shaft. This allows me to remove the small carbon fiber pin from the main gear so that I can get to the screws that hold the motor in place. If the pin becomes loose, I intend to use a small piece of tape on it to keep it from slipping out.
After the motors are installed, I connected them to rechargable batteries to run them for breakin. I used two AA NiMh cells for the main motor and one cell for the tail motor and ran them both for about two hours. Running them this long should allow the brushes and commutators to seat properly. Don't leave the rotor head installed when you breakin the motors.
The next step is to install the servos, receiver, and gyro. These are installed within small card stock forms. I made one modification to the design here: I moved the roll servo to behind the main rotor post so that there is room in front of the post for larger motors, such as a brushless motor like the Astro 010 or Hacker. I used my rotary tool to cut a small groove in the back of the servo I moved so that the servo would lay flat against the other servo. Others have found a nice coreless motor, the Orion, that drives the House Fly very well when controlled by the Pixie 7 speed controller. It can run on 10.8 volts, which is the nominal voltage of three Lithium Ion cells. Flying times of more than 15 minutes have been reported with this motor/battery/ESC combination. I'll be ordering one of these motors shortly.
When everything is assembled, it is time for initial testing and balancing. Make sure the heli balances correctly. Move the battery (or ballast weight if you're using a tether) until the skids don't come up or down at an angle to the floor when you lift the heli by the flybar. Then check the operation of the swashplate as described in the directions.
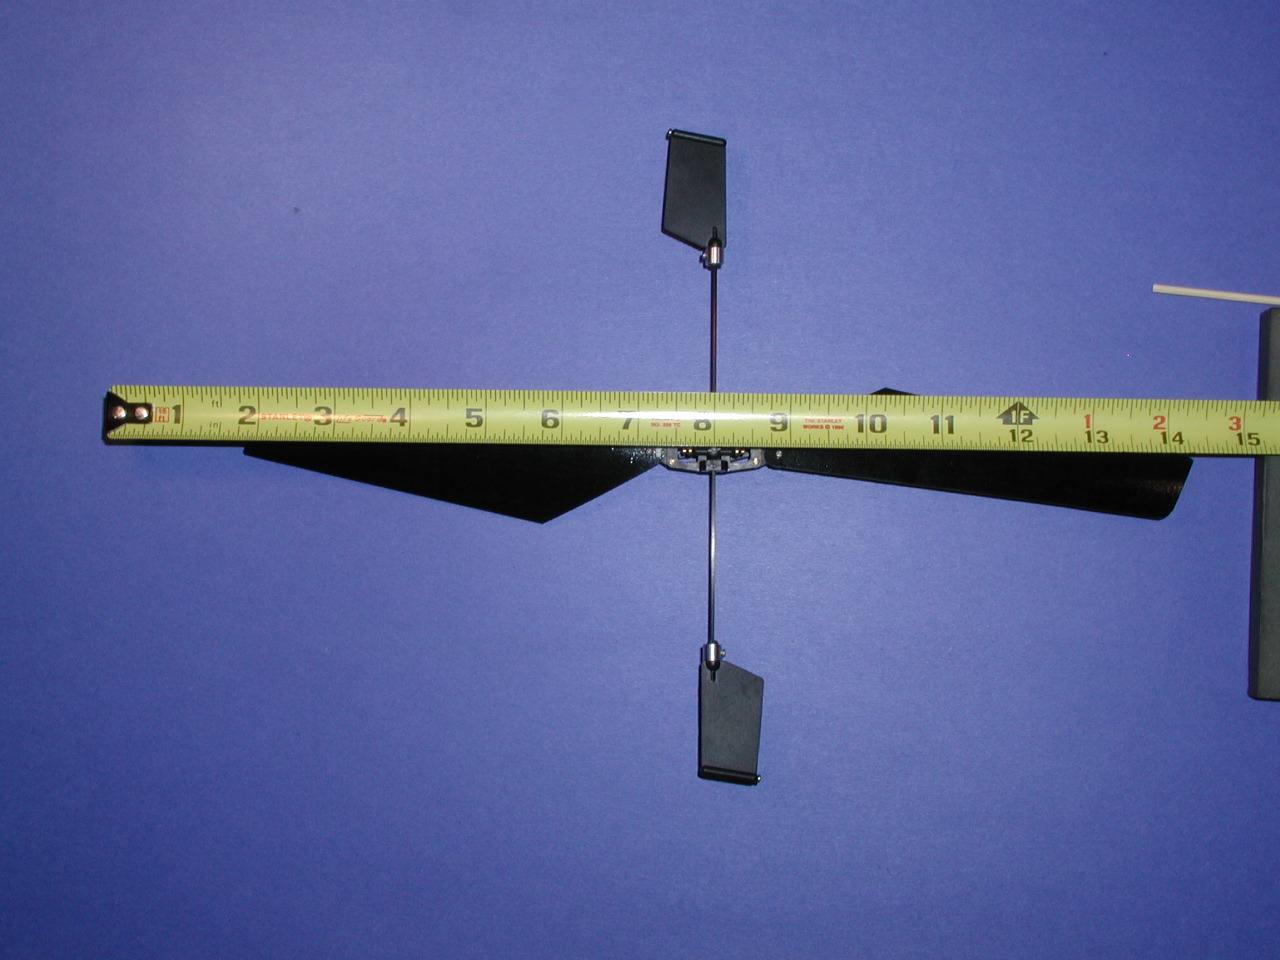
I found that the rotor initially had a lot of vibration as it started turning. The directions say that vibration at low speeds is normal. However, there is no mention of how to align or balance the rotor blades for minimum vibration. I used a straight edge to align the tips of the rotors with the center of the head. In the photo, you can barely see the tips of both rotor blades and each tip is the same distance from the ruler. The ruler is aligned perpendicular to the flybar. I found that very little vibration remains. Further testing shows that if the blade screws are loosened slightly, the blades will find their own balance point. There should be a little friction on the blade mounts, but not so much that the blades can't rotate to their natural balance point as the rotor spins up.
During my first practice flights, I found that the tail rotor was hitting the floor. I replaced the stock tail guard with a longer one made from a business card. I cut the business card in half, glued the two halves together, shaped it with scissors, and taped it to the tail boom with masking tape. I colored the masking tape black after taking this photo. Even with this modification, the tail rotor can still hit the floor when in a tail-down position or when in a steep right bank.
The end result is a nice, small helicopter. The top of this page shows the front view of the completed heli, without the canopy. Here is a photo of the completed heli from the back.
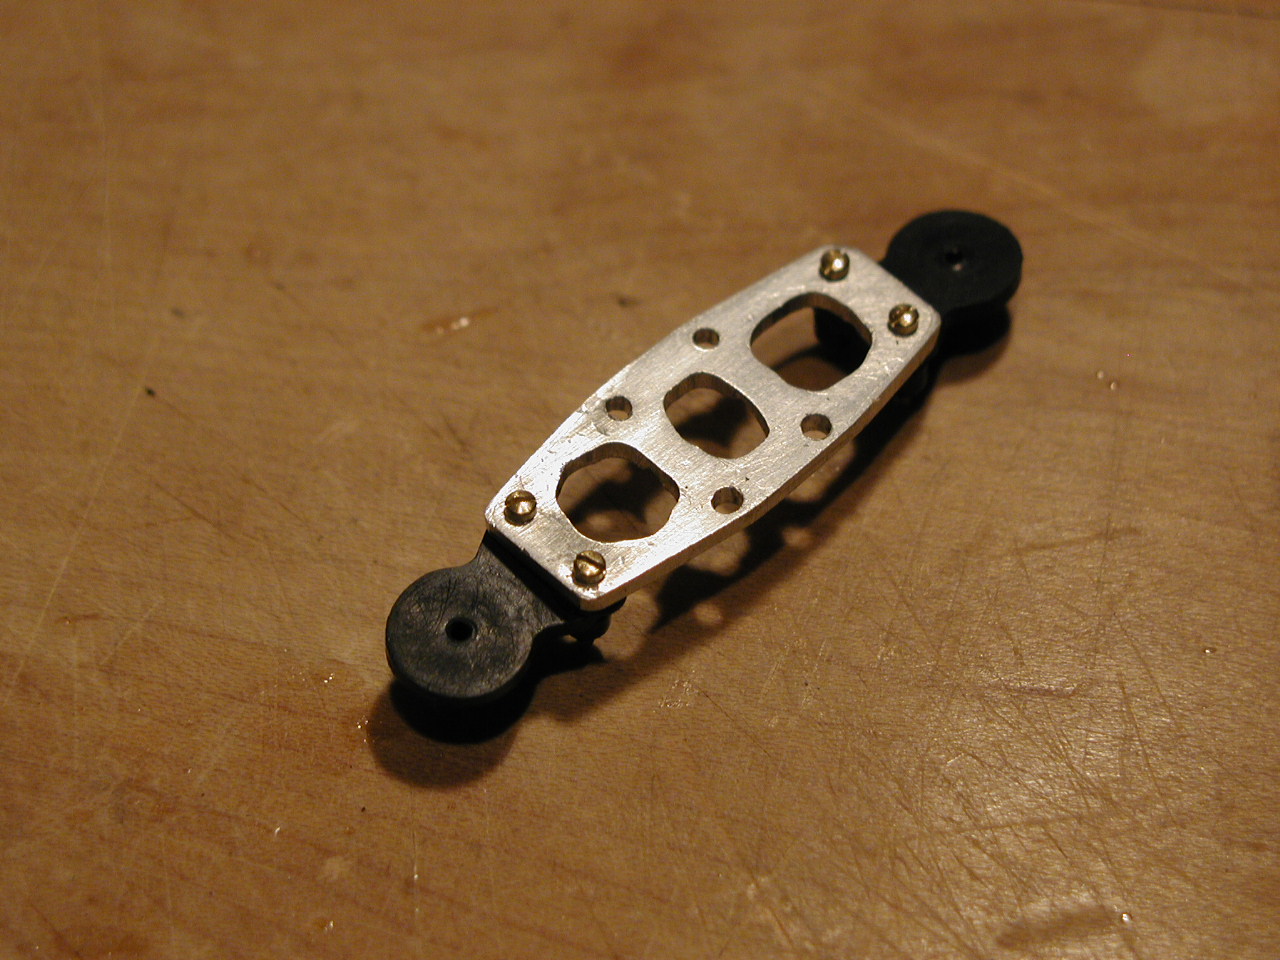
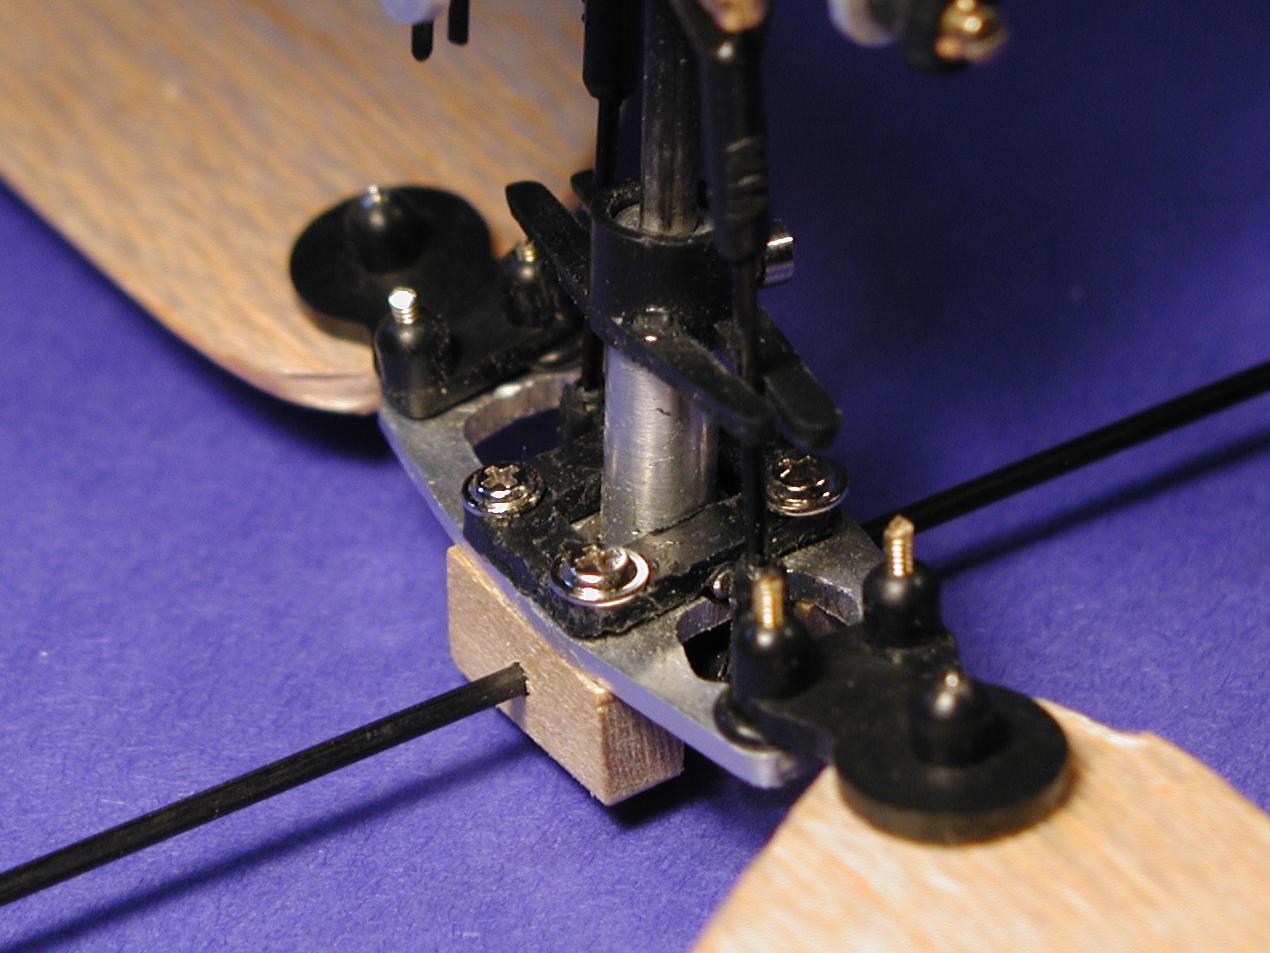
The House Fly ran into the sewing machine on the dining room table and broke the rotor head. I knew that getting replacement parts would take longer than I wanted to wait, so I began looking around for material from which to make a replacement. Some of the discussions on the EZone helicopter forum described using plastic with carbon fiber reinforcing or aluminum for stiffer rotor heads. I found a scrap piece of 1/16-inch aluminum and after a couple of hours work with a hacksaw, files, drills, and a rotary tool, I had a replacement rotor head. This one will not break!
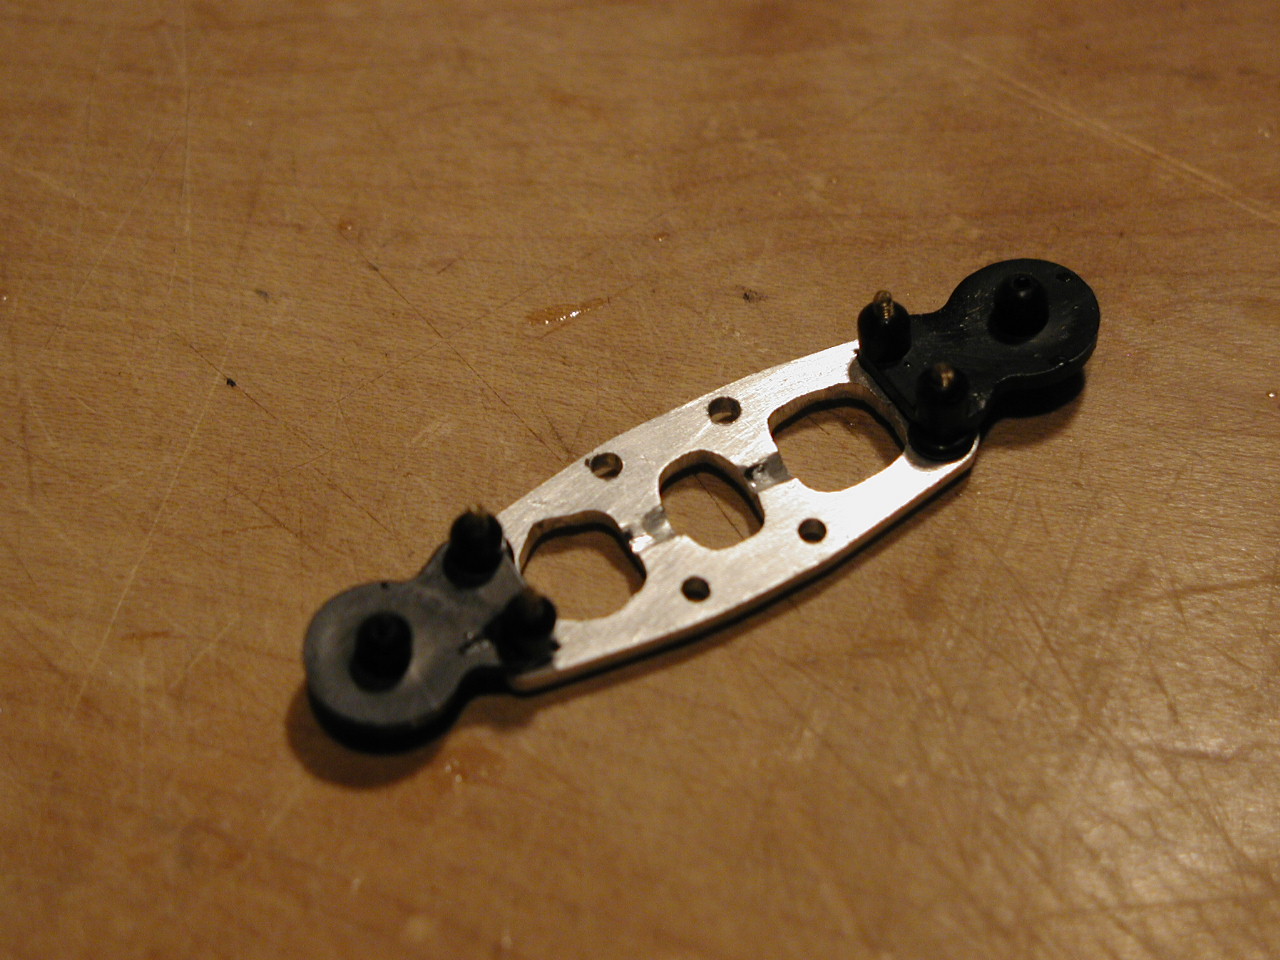
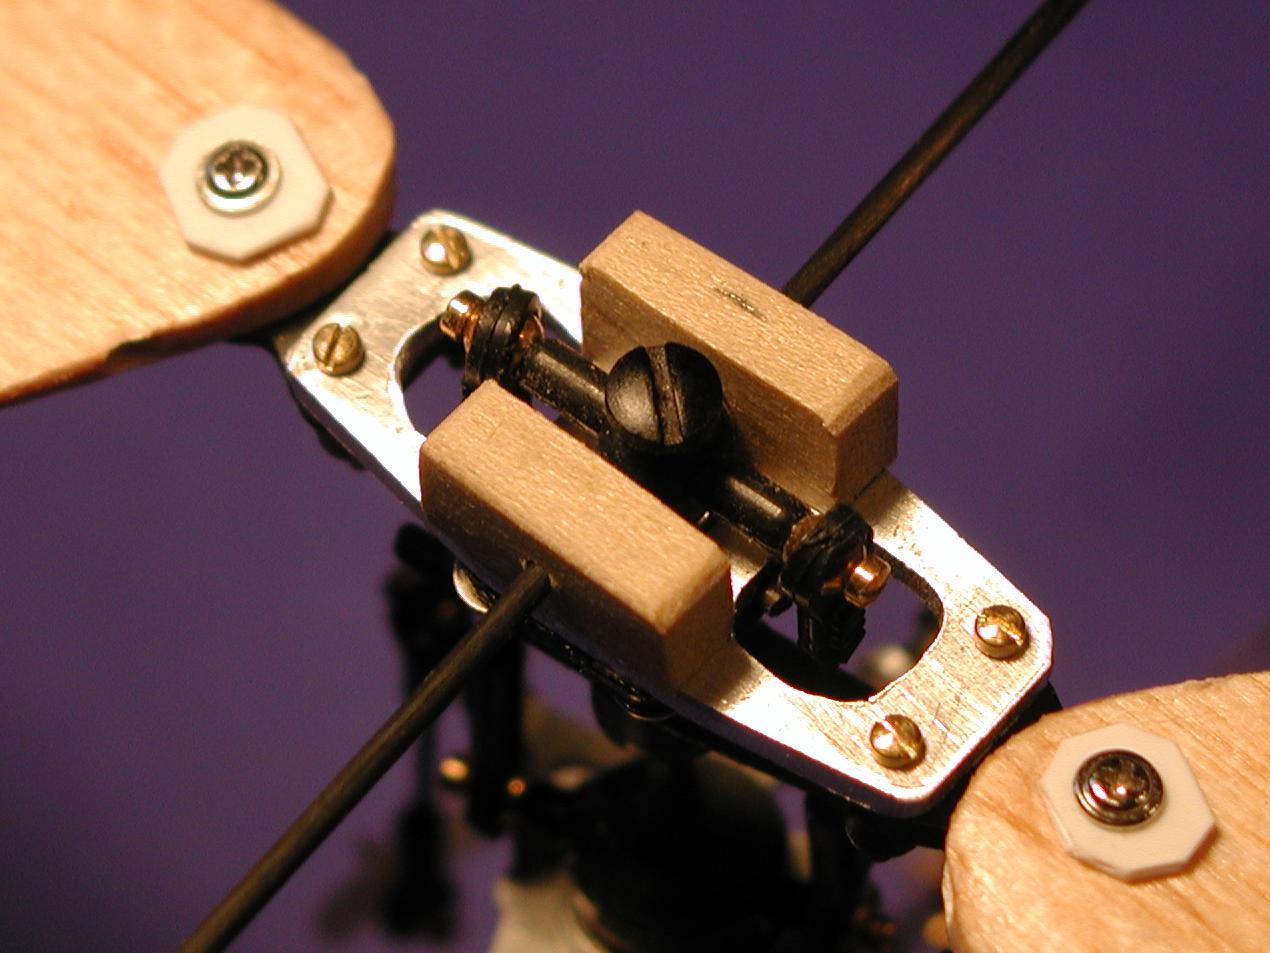
The new rotor head is great, but then the flybar supports broke away from the rotor head. The flybar supports are two pieces of plastic that are easily replaced with two small blocks of spruce wood, mounted through the bottom with four small wood screws (I used the screws that came with the GWS servos). The new system is smoother running than the original system at full throttle. Note the pencil mark on one of the flybar supports. I use the mark to uniquely identify each side of the rotor head for balancing tests.
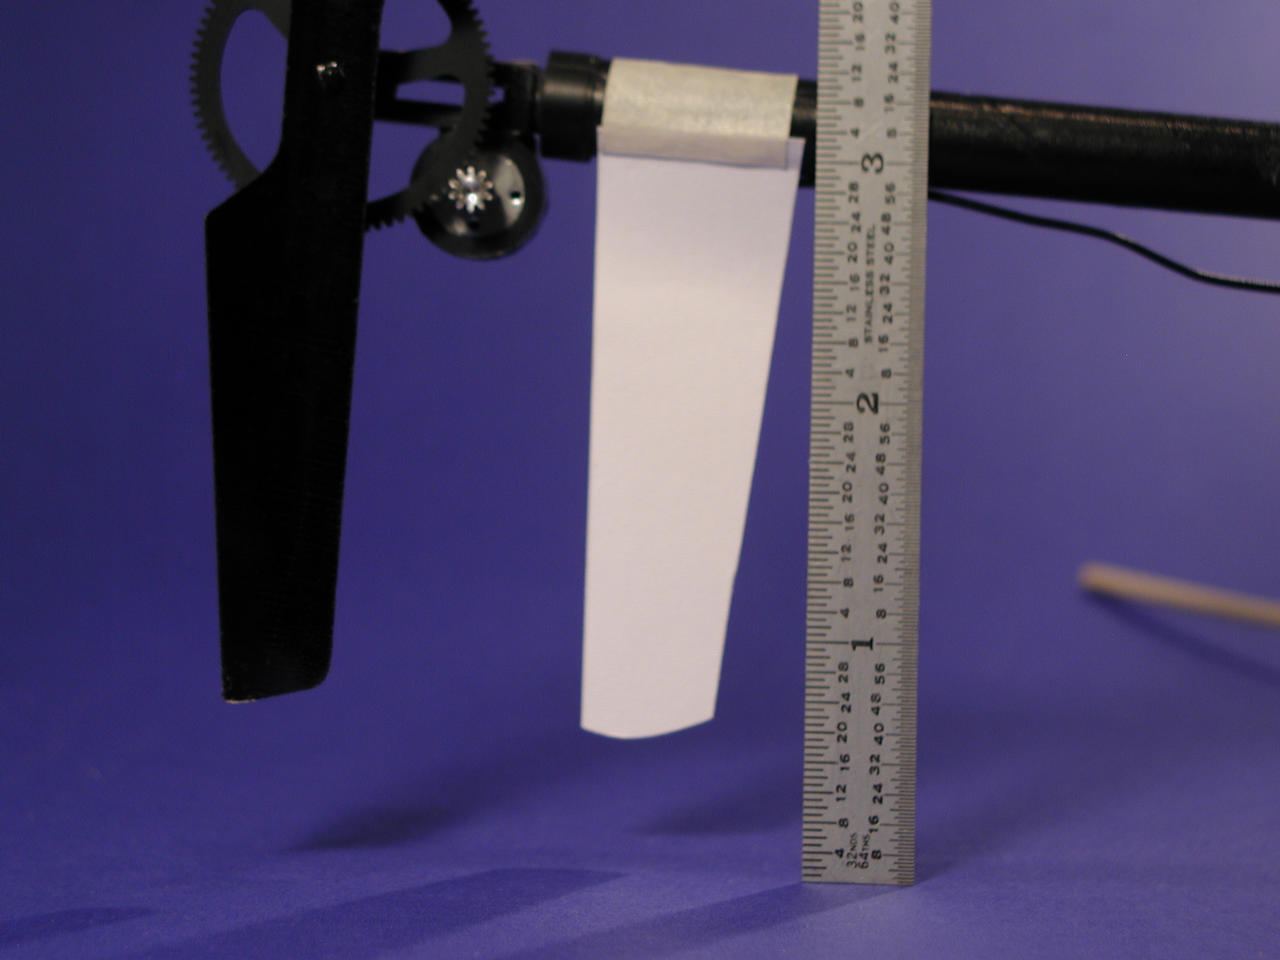
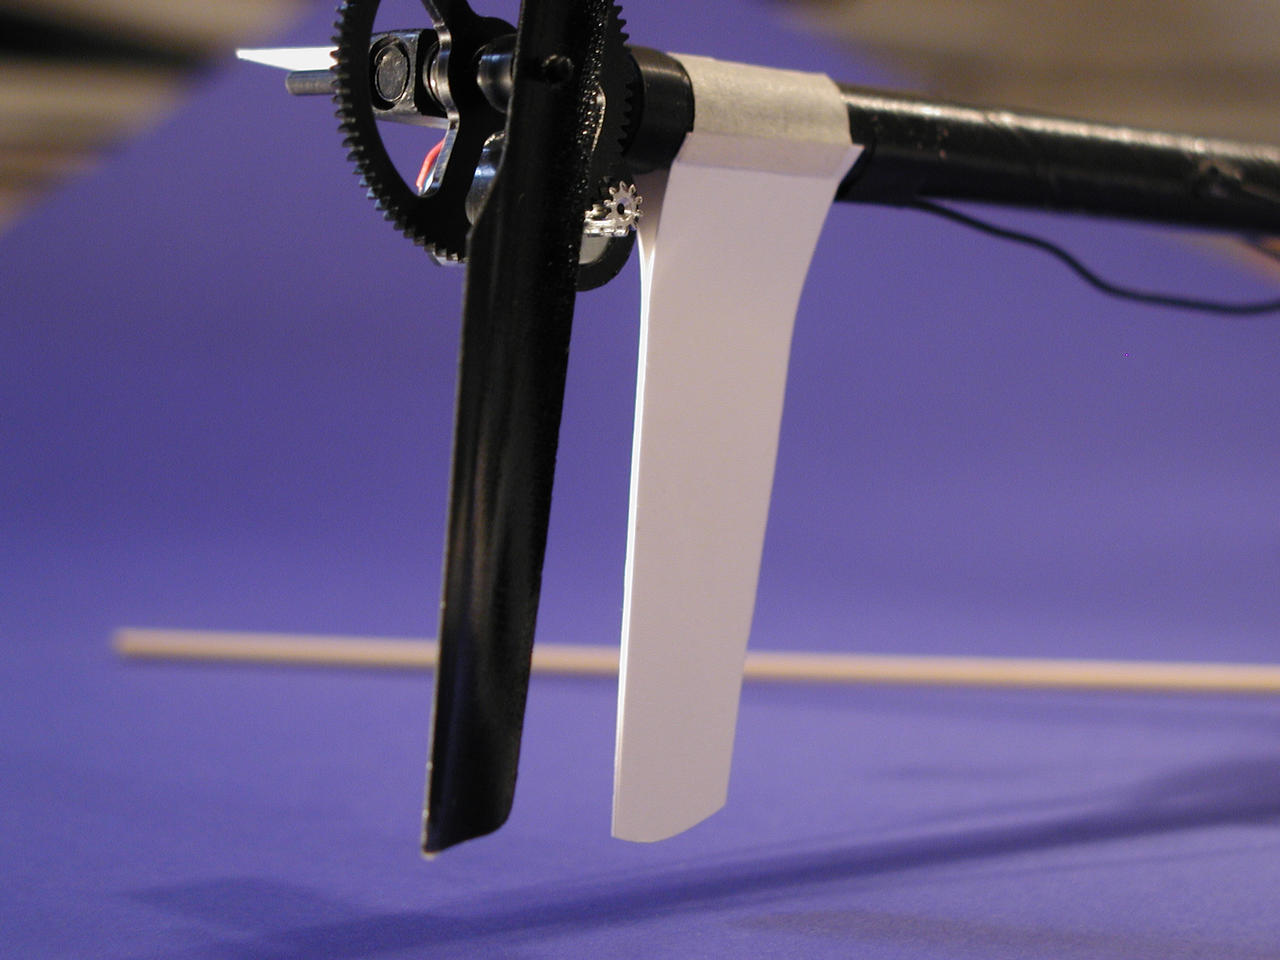
The stock blades are nice and light and very durable. However, they are highly cambered and therefore create a lot of drag. The drag contributes to torque which the tail rotor must overcome. Several experienced heli modellers have had good success using flat-bottom blades made from basswood (light and stronger than balsa). I didn't have the appropriate size basswood available, so I made mine from 1/8-inch heavy balsa. Each blade has an airfoil shape with a flat bottom. When shaped, I sealed each with Balsarite and lightly sanded them. I balanced the blades with respect to each other by screwing them together at their mounting holes and checking for balance. A little more sanding on the heavy blade and another coat of Balsarite on the light blade brought them into balance.
The latest modification to the House Fly is the addition of an Orion Elite Modified motor (available from Hobby People or Tower Hobbies). It is a coreless motor with an efficiency of 86%. It weighs a bit more than the GWS motor that came with the kit, but is very smooth and has much more power than the GWS motor. Be sure to make sure it is the "Modified" motor - it is roughly twice as powerful as the Stock motor. Expect to pay $44-$49 for it. Even though it is a coreless motor, it can be operated by a standard ESC. The Pixie 7 ESC seems to be the favorite since the motor shutoff on low voltage can be disabled (it wouldn't be good to have the ESC shut off the main motor at any significant altitude).
There is a lot of good information on modifications to the
House Fly on the Ezone helicopter
forum. Below are some links about important discussions started by John
Kallas. There are also many more discussion threads on Ezone about
the House Fly helicopter.
Housefly First test results
Test results - part two
Two Housefly mods
Another Housefly mod
Housefly blade design
Housefly motor #1 out of service
Housefly motor #2 out of service
Housefly adjustable tail motor mount mod
House Fly motor transplant
HouseFly Stuff (pictures of various HF modifications and parts)
HouseFly Stuff, part 2 (pictures of various HF modifications and
parts)